Solar Charge Controller Sizing Formula | Easy Explanation
Feeling puzzled about why your solar batteries are constantly meeting their demise? I’m an electrical engineer who’s practically held post-mortems for countless DIY solar projects gone away, and one glaring culprit stands out: improper charge controller sizing. Whether it’s residential solar or heavy-duty industrial setups, after years of consulting, I can attest that nailing the size of your solar charge controller is no walk in the park.
Now, don’t blame yourself if you’re not an electrical whiz. The truth is that handling the technical specs without specialized training is a recipe for miscalculations. Yet, these miscalculations can have serious consequences – think fried equipment, lifeless batteries, or, worst-case scenario, electrical fires. To steer clear of such disasters, you’ll need more than just a passing interest; you’ll need a meticulous approach, which I’m here to share.
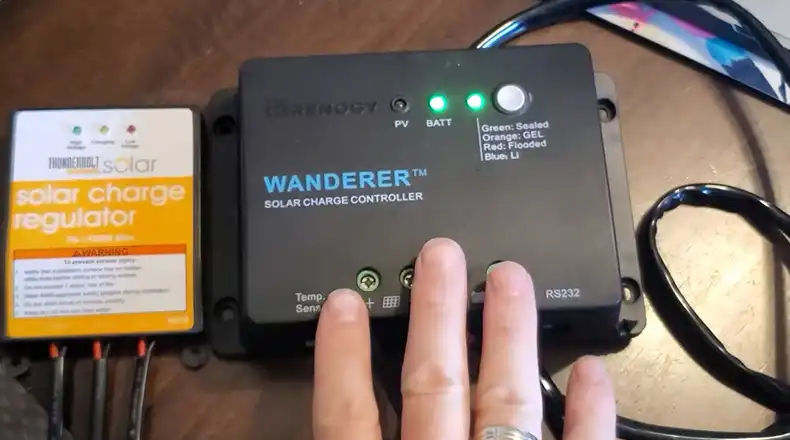
What is a Solar Charge Controller?
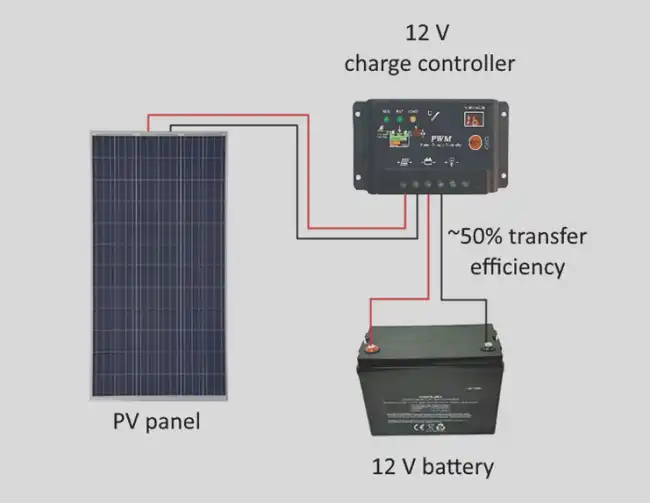
A solar charge controller manages the power flowing from your solar panels into your battery bank to prevent overcharging. It regulates voltage and current levels, optimizes battery charging, and prolongs your battery life. An undersized controller can lead to system failures or dangerously overcharged batteries.
Why Proper Solar Charge Controller Sizing Matters?
With improper sizing, your charge controller will become the weak link in your solar system. An undersized controller attempts to manage more current than its components can handle, leading to premature failures. Dangerously oversized controllers allow too much current for safe battery charging. Correct photovoltaic system controller sizing is key for safety, performance, and longevity.
How to Calculate Controller Array Current?
To select a properly sized solar charge controller, you first need to calculate the maximum current from your photovoltaic array using this formula:
Max Array Amps = Total Max Panel Power (Watts) / Nominal Battery Voltage (Volts)
You then multiply this by 1.25 as a safety buffer:
Controller Max Array Amps = Max Array Amps x 1.25
For example, for a 100W, 12V solar panel:
100W / 12V = 8.3A
8.3A x 1.25 = 10.4A
So for this single 100W solar panel, select a charge controller rated for greater than 10.4A array current.
For multiple panels, perform the same Max Array Amp calculation above for each panel and sum the results before applying the 1.25 safety multiplication.
How to Calculate Controller Load Current?
Next, you need to calculate the current drawn by the loads/batteries the charge controller must manage. The method depends on whether you use a PWM or MPPT charge controller:
PWM Charge Controller
For simple PWM, in other words, Pulse Width Modulation controllers, use this formula:
Total Load Amps = Total Wattage of Loads / Nominal Battery Voltage
So for a 300W, 12V load:
300W / 12V = 25A
Select a PWM controller rated for greater than 25A load current.
MPPT Charge Controller
For more advanced MPPT, in other words, Maximum Power Point Tracking more efficient controllers, the formula is:
Total Load Amps = Total Wattage of Loads / MPPT Efficiency / Nominal Battery Voltage
Assuming 95% MPPT efficiency and the same 300W load on a 12V system:
300W / 0.95 / 12V = 26.3A
So select an MPPT controller rated for greater than 26.3A load current.
Additional Solar Charge Controller Considerations
Controller sizing is important, but maximum current ratings/wattages cannot tell the whole story. Here are additional key factors I evaluate when specifying charge controllers:
Voltage Rating – Confirm your controller’s max PV open circuit and nominal battery voltages match your system.
Temperature Compensation – Better controllers actively modulate charging based on temperature.
Advanced Charging Settings – Look for advanced equalization/absorption/float charging options.
Remote Monitoring – Data logging and remote oversight ensure proper operation.
Warranties – 5-10 year warranties reveal reliable products.
Reputation – Established vendors specializing in solar controllers tend to produce better products.
How to Choose the Right Controller Type and Size?
Deciding on PWM vs MPPT controllers and properly sizing them can seem complicated. But here’s a simplified breakdown:
a) For small, low-power systems, PWM controllers offer simple reliable charging. Size for max array and load amps as outlined above.
b) For larger systems over 200W, MPPT controllers are usually a better choice. Their maximum power point tracking captures 30% more power, making them much more efficient. Still, the size for max array/load amps is as described earlier.
c) Beyond proper array/load current ratings, also evaluate controllers on advanced functionality, remote monitoring, and extensive warranties from reputable vendors.
In summary, while PWM controllers suffice for smaller setups, the superior efficiency and cycling of MPPT controllers make them my top choice for most installations.
PWM vs MPPT Charge Controllers
To dive deeper into controller selection, let’s compare these two primary technologies:
PWM controllers are simpler and less expensive, relying on basic on/off switching regulations. Great for smaller systems up to 200W.
MPPT controllers actively track and convert maximum wattage from solar arrays. More complex circuitry but is 30% more efficient for larger systems.
For small hobby setups, PWM works well. But MPPT dominance for mid to large installs shows why pros overwhelmingly prefer MPPT controllers for their efficiency, features, and system performance advantages.
Which Solar Charge Controller is Better?
Over years of designing complicated off-grid solar power systems as well as simple DIY installs, I can confidently say that for most homes, the MidNite Solar Classic MPPT line represents the best charge controllers money can buy. Their unparalleled 94% peak efficiency, customizable color touchscreen interface, extensive charging customization options, and rated lifespan of over 1 million cycles mean you can trust a MidNite controller to serve your family flawlessly for decades. MidNite offers various controller sizes to handle 200W to 10,000W arrays and battery banks up to 1000 amp-hours. While their professional-grade gear demands a premium cost, you cannot put a price on confidence, reliability, and longevity for critical electrical infrastructure.
People Also Ask
What size charge controller for a 200w solar panel?
With a 200W panel on a 12V system, the amperage calculations would be:
200W / 12V = 16.7A
16.7A X 1.25 = 20.9A
So select a charge controller rated for greater than 21A array current. An MPPT controller in the 30-40 amp range would suit this 200W solar panel well.
What size charge controller for a 100w solar panel?
For a 100W, 12V panel:
100W / 12V = 8.3A
8.3A x 1.25 = 10.4A
Choose a controller rated for greater than 10.4A. A small PWM or 15A MPPT controller would safely handle this 100W solar panel.
How many watts can a 100-amp charge controller handle?
For an assumed 95% efficient 100A MPPT charge controller running on a 48V system, the max watts can be estimated as:
Max Watts = Amps x Volts x Efficiency
Max Watts = 100A x 48V x 0.95 = 4560W
So a 100A MPPT charge controller could handle approximately a 4500-watt solar array.
End Note
While advanced power electronics calls for a disciplined design approach, I hope breaking down the methodical solar charge controller sizing process proves empowering rather than overwhelming. Here, you’ve learned from first principles through to nuanced controller differentiators so you can make highly informed decisions for your unique installation needs. With your personalized solar roadmap now laid out, I wish you the best of luck with your build-out! Please don’t hesitate to reach back for any guidance bumps along the journey – learning from professionals helped me tremendously early on to avoid pitfalls on the path to mastery. And remember, perfectly sized charge control forms the critical foundation on which durable solar success gets built!

