How to Charge Solar Lights with an On/Off Switch? Charging Processes Covered
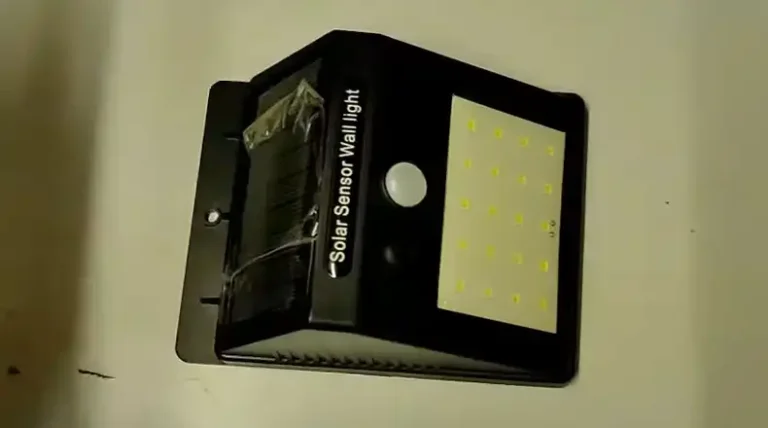
Solar lights have become quite popular for outdoor lighting purposes. They offer the convenience of auto charging through solar panels during the daytime and turning on automatically at dusk thanks to the built-in light sensor. However, many solar lights come with an On/Off switch which often needs clarification regarding the right charging method. So does the switch play any role in charging them? Let’s find out.
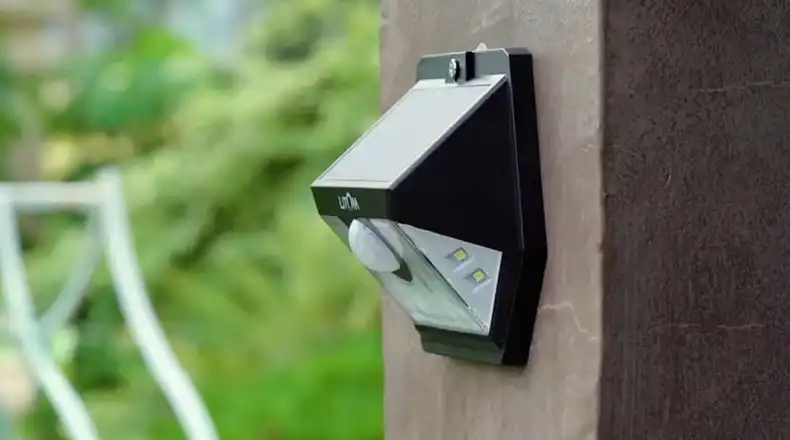
Does the Switch Play Any Role for Charging the Solar Lights?
Solar-powered lights are a convenient outdoor lighting solution, that automatically turns on at night. However, many come with a manual on/off switch, which confuses some users about the right charging method. This article provides clear guidance on leveraging both solar power and the switch for optimal charging.
Leave the Switch on And Let the Solar Panel Charge the Battery
Simply leave the On/Off switch in the On position and place the solar panel under direct sunlight. The solar cells will convert the sunlight into electricity and charge the connected battery automatically.
However, battery power may be utilized to power the LED lights if the ambient light sensor gets triggered. So expect slightly longer charge times than when the switch is turned Off.
Turn the Switch Off and Charge the Battery Manually
For faster and more efficient charging, turn the On/Off switch to the Off position before placing the solar panel in the sun. This prevents any battery drainage via the LED lights.
Once fully charged, manually turn the switch back to the On position to start using the solar lights. This ensures the maximum possible charge current is delivered to the battery.
To summarize, while solar charging works irrespective of the switch status, turning it Off prevents unnecessary battery usage, allowing faster charging.
Procedure for Charging with the Direct Sunlight
Follow these steps to charge your solar lights with direct sunlight:
Step 1: Clean Solar Panels so Sunlight Absorption Is Maximized.
Dust, dirt, and other debris can accumulate on solar panels, reducing their ability to absorb sunlight and convert it into electricity. Regularly cleaning the solar panels with a soft cloth and mild soapy water will help to ensure that they are operating at their full capacity.
Step 2: Turn the Power Switch Off to Prevent Any Battery Drain.
While solar lights are typically designed to charge even when the switch is turned on, turning it off will help to conserve battery power and extend the time between charges. This is especially important if you are not using the solar lights frequently or if they are located in an area with limited sunlight.
Step 3: Angle Panels to Directly Face Hours of Unobstructed Sunlight, Ideally in South-Facing Spaces Like Patios.
The angle of the solar panels is crucial for maximizing sunlight absorption. Aim to position the panels so that they face directly toward the sun for as many hours as possible. In the Northern Hemisphere, this means facing the panels towards the south. If you are in the Southern Hemisphere, the panels should face north.
Step 4: Leave in Full Sun for 6-8 Hours for A Complete Battery Recharge.
Most solar lights will require at least 6-8 hours of direct sunlight to fully charge the battery. However, this can vary depending on the size and efficiency of the solar panel, as well as the capacity of the battery.
Step 5: Flip the Switch Back on At Dusk to Use Lights.
Once the solar lights have been charged for a full day, simply flip the switch back on to enjoy the illumination they provide. The lights will automatically turn off at dawn and begin charging again the next day.
Procedure for Charging with the Indirect Sunlight
If constant direct sunlight is unavailable, you can still charge solar lights effectively using indirect or ambient sunlight. Just follow these steps:
Step 1: Clean the Solar Panel Surface and Make Sure the Lights Switch Is Turned Off
Before placing the solar lights indoors for charging, clean the solar panel surface to remove any dirt, debris, or bird droppings that could obstruct sunlight absorption. Use a soft cloth and mild soapy water to wipe down the panel. Once the panel is clean and dry, turn off the switch on the solar lights to conserve battery power during the charging process.
Step 2: Place the Solar Lights Next to A Bright, Sunny Window Indoors Where They Will Receive Plenty of Ambient Daylight.
Choose a location near a south-facing window that receives direct sunlight for most of the day. Avoid placing the solar lights behind curtains or blinds, as this will significantly reduce the amount of sunlight reaching the panel. Position the lights so that the solar panel is facing directly toward the window, ensuring maximum exposure to ambient daylight.
Step 3: Ensure the Panel Faces Outward Toward the Sunrays Coming
To maximize sunlight absorption, make sure the solar panel is unobstructed. Remove any objects, such as plants or furniture, that could block the sunlight from reaching the panel. If there are curtains or blinds on the window, consider opening them fully to allow the sun rays to pass through unobstructed.
Step 4: Leave the Solar Lights in This Spot for 8 to 12 Hours for A Full Charge via Diffused Indoor Sunlight.
The charging time for solar lights using indoor sunlight will depend on the size and efficiency of the solar panel, the capacity of the battery, and the intensity of the ambient daylight. Generally, it takes approximately 8 to 12 hours for a full charge. Allow the solar lights to remain in the designated spot for the recommended charging duration to ensure adequate battery power.
Step 5: Finally, Turn the Switch Back on To Start Using the Solar Lights Outdoors After Sundown.
Once the solar lights are fully charged, simply turn the switch back on to activate them. The lights will operate using the stored energy from the indoor charging session. You can then place the solar lights outdoors where they will provide illumination during the night.
So with strategic placement on bright window sills, solar panels can harness enough ambient light through the glass to effectively charge batteries.
Procedure for Charging with Artificial Light Source
In case natural light is insufficient due to weather conditions or limited sun hours in your location, you can charge solar lights with artificial light sources. Here are the steps to follow:
Step 1: Use a bright 40-100-watt incandescent or LED bulb as the light source
The choice of light source is crucial for effective charging. Opt for a bright incandescent or LED bulb with a wattage between 40 and 100 watts. These bulbs provide sufficient intensity to generate the necessary energy for charging the solar panel. Avoid using weaker bulbs, such as those with lower wattage or compact fluorescent lights, as they may not deliver enough intensity for efficient charging.
Pro Tip – Avoid weaker bulbs or compact fluorescents.
Step 2: Position the solar panel under an inch from the light source to form a tight beam. This concentrates the intensity.
To maximize the concentration of light on the solar panel, position it directly under the light source, ensuring a distance of no more than an inch. This proximity helps focus the light beam directly onto the panel, enhancing the charging process.
Step 3: Keep the On/Off switch turned off to prevent battery drain via the LEDs
To conserve battery power and avoid accidental activation during the charging process, keep the On/Off switch turned off. This ensures that the battery receives the full charge from the artificial light source without any unnecessary power drain.
Step 4: Adjust the solar panel directly facing the artificial light beam for 6-8 hours for a full charge.
Orient the solar panel directly towards the artificial light beam to maximize light absorption. Allow the solar panel to remain in this position for approximately 6-8 hours for a full charge. The charging duration may vary slightly depending on the size and efficiency of the solar panel and the capacity of the battery.
Step 5: Finally, turn the power switch back on to start using the solar-powered lights outdoors.
Once the solar lights have been fully charged using the artificial light source, simply turn the power switch back on to activate them. The stored energy from the charging session will power the lights, allowing you to use them outdoors for illumination.
While direct sun is the best source, artificial light can also be substituted in a pinch when sunlight is inaccessible or weather delays charging.
Tips for Optimal Charging
Follow these tips to ensure your solar lights charge reliably and efficiently:
Wipe dust and dirt off solar panels monthly for maximum sunlight absorption.
Dust, dirt, and other debris can significantly reduce the amount of sunlight that reaches the solar cells, hindering their ability to convert sunlight into electricity. Regular cleaning of the solar panels ensures that they are operating at their full capacity and maximizing sunlight absorption. A simple monthly wipe with a soft cloth and mild soapy water is sufficient to keep the panels clean.
Always charge with the power switch in the Off position to prevent battery drain.
While solar lights can often charge even when the switch is turned on, it’s recommended to switch them off during charging to conserve battery power and extend the charge duration. This is particularly crucial if the solar lights are not used frequently or if they are located in areas with limited sunlight. Turning off the switch prevents the lights from drawing power while charging, ensuring that the battery receives the full charge from the solar panel.
Track the hours of sunlight in your location monthly and charge accordingly from March to October.
The amount of sunlight available varies throughout the year, and solar lights may require longer charging times during months with shorter daylight hours. Monitoring the monthly sunlight patterns in your area allows you to adjust the charging schedule accordingly. During periods of reduced sunlight, such as from November to February, consider charging the solar lights more frequently or for longer durations to maintain adequate battery levels.
Bring solar lights indoors during winter or extended overcast periods for charging via bright artificial lighting.
When prolonged periods of overcast weather or winter conditions limit outdoor sunlight exposure, consider bringing the solar lights indoors for charging. Place them near bright artificial light sources, such as high-wattage LED lamps, to supplement the charge received from natural sunlight. This approach helps maintain the battery level and ensures that the solar lights are ready for use when outdoor conditions improve.
Consider charging the battery manually via USB or DC ports in very cloudy or dark regions.
In areas with consistently limited sunlight or extended periods of darkness, manual charging via USB or DC ports can be a viable option to maintain battery levels. This method is particularly useful in regions with frequent overcast weather patterns or during the winter months when daylight hours are significantly reduced.
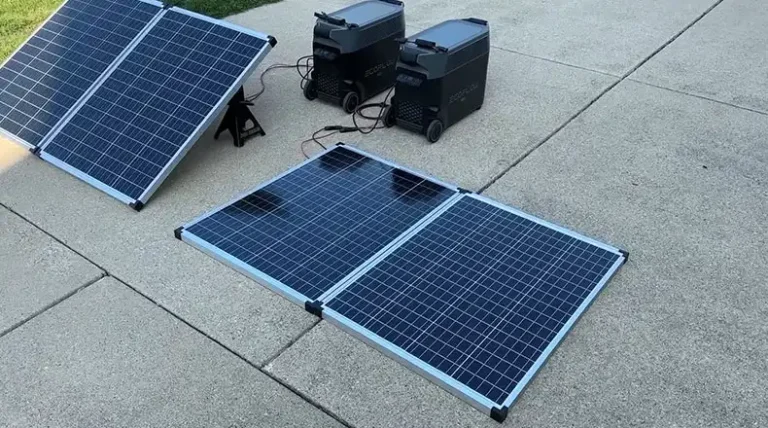
Position off-grid lights in optimal southern exposure and tilt angle to maximize solar charging current.
Maximizing solar charging efficiency requires strategic positioning of the solar lights. In the Northern Hemisphere, orient the solar panels towards the south to receive the most direct sunlight. Adjust the tilt angle of the panels to align with the sun’s trajectory throughout the day, ensuring optimal sunlight capture. This optimization of panel placement and tilt angle significantly enhances the charging current and ensures that the battery receives sufficient power.
So a bit of planning and strategic placement goes a long way in helping solar lights effectively harness all available sunlight. Just avoid shade and track seasonal sun hours.
Conclusion
I hope this article provided you with a clear, step-by-step understanding of how to effectively charge solar lights that come with a manual On/Off switch. While the switch itself does not impact charging – keeping it in the Off position can substantially improve charge efficiency. Whether harnessing direct summer sunbeams or indirect ambient light all year round, optimally positioning your solar panels is key for a reliable, self-powered outdoor lighting solution.
Feel free to leave a comment below if you still have any queries regarding solar light charging. And don’t forget to share these tips with friends or family interested in installing solar lighting in their yard or garden! Thanks for reading.
People Also Ask – PAA
What is the ideal voltage to charge a solar light battery?
Most solar light batteries require between 4.2 – 4.5 volts for a full charge. This typically takes 6-8 hours under direct summer sunlight. Lower winter sun may need a 12-hour charging duration.
How can I tell if my solar light battery is fully charged?
Check if your solar lights glow brightly for 6-8 continuous hours after sunset. Also, observe if the time from switch on to shutoff remains consistent daily. Dimming or drastically reduced operation at night indicates an undercharged battery.
Can I charge my solar lights on a cloudy or rainy day?
While solar charging works best under direct sunlight, you can still effectively charge your solar lights using bright artificial lighting on overcast or rainy days. Position bulbs very close to the panel.
Is it safe to leave solar lights charging continuously in sunlight?
Yes, it is perfectly safe to leave solar lights charging in the sun continuously. The built-in charge controllers will automatically cut off power to the battery once it reaches full capacity to prevent overcharging.
How do I slow battery drain in my solar lights at night?
Use LED bulbs no greater than 1-3 watts in your solar lights. Choose the lowest lumen option available and conserve power by keeping lights off when not required via a timer or smart switch. These measures drastically slow nighttime battery drain.

