How to Install a Solar Blanket Pool Cover on a Reel System
Using a solar pool cover is an excellent way to retain heat in your pool, reduce water evaporation, and cut down on chemical usage. However, removing and replacing the large cover can be a hassle without the right equipment. A reel system makes managing your solar blanket effortless by allowing you to roll it up compactly when not in use.
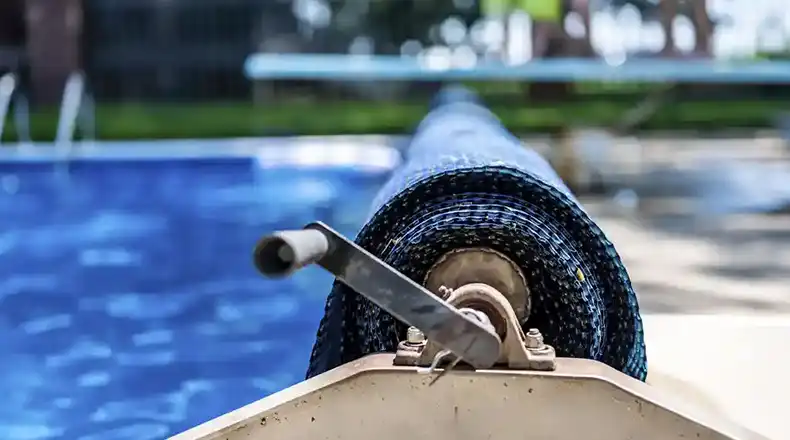
Reel systems use a crank mechanism to wind up the cover on a metal axle mounted between two posts or base units. This lets you easily roll the cover on and off the pool with minimal effort. Most quality solar covers come with straps, buckles, velcro strips or other attachment systems to securely fasten the cover to the reel.
The convenience of a reel system eliminates the headache of wrestling with a large, heavy solar blanket. With a few simple tools and about an hour of installation time, you can have a reel set up and be enjoying the benefits of an easily managed solar cover. Here’s how to do it.
Step #1: Prepping for Installation
Before beginning the installation, gather the necessary tools. You’ll need a drill, screwdriver, tape measure, scissors, and gloves at minimum. It’s also wise to have the manufacturer’s instructions handy as a reference.
Ensure your solar blanket is clean and completely dry before attempting to attach it to the reel system. Any dirt, debris or moisture can prevent the attachment system from gripping properly.
As a safety precaution, wear gloves when handling the solar cover during installation to avoid any cuts from the vinyl material or attachment components.
Step #2: Installing Pool Cover on the Reel System
General Steps
- Decide on the location for the reel posts or base units. These should be positioned near one end of the pool to allow the cover to unwind smoothly over the water’s surface when extending or retracting it.
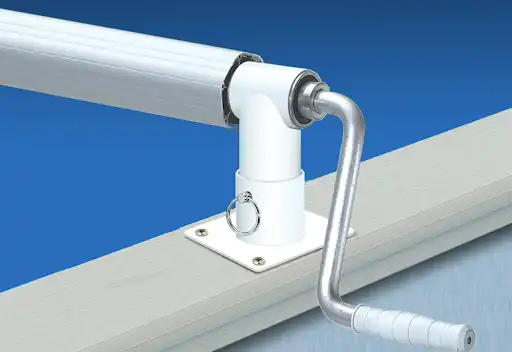
- Following the manufacturer’s directions, assemble the posts/base units and reel axle. This will likely involve using the included hardware to bolt the components together securely.
Here are some more model-specific instructions for different reel systems for a more precise set of instructions:
Gli Whirlwind 28ft 4in Reel
This popular reel system comes with tailored instructions for the included 4-inch post kit:
- Discard any unused 3-inch post inserts and bolts included for another model.
- Assemble the 4-inch post components and axle precisely, ensuring proper alignment.
- Use the provided through-bolts to secure the post tubes together after pre-drilling holes at the indicated locations.
- Mark and drill holes along the length of the axle where you’ll attach the cover’s straps.
- Using the screws provided (or longer 3-inch screws), attach the strap ends to the pre-drilled holes on the axle.
- Optionally, add a bungee cord or strap looped through the axle to help secure it when rolled up.
Pool Ruler Solar Cover Strap Kit

This system uses a series of buckled straps with velcro to attach the cover:
- Space the strap plates evenly and use screws to attach them to the end of the cover material.
- Cut a thin channel lengthwise into the cover material using scissors or a utility knife. This allows the strap material to sit flush.
- Thread each strap through the buckle and attach the buckle end to the plate.
- Clean and dry the area on the cover material where the velcro will attach.
- Adhere the velcro strips to the underside of the cover and the top of the axle/reel.
- Roll up the cover onto the reel, overlapping the velcro strips along the way and adjusting strap tightness as needed.
Alternative Attachment Methods for Solar Blankets to the Reel System
Straps with Buckles
If your cover didn’t come with a strap kit, you can install a basic buckle strap system following the Pool Ruler method. Space and attach buckles to the end of the cover material, creating channels if needed for the straps to sit flush.
Hook and Loop Straps (Velcro)
Attach adhesive-backed velcro strips to both the cover and reel axle. Position the strips every 1-2 feet and ensure good contact with the surface.
Step #3: Attaching the Straps to the Reel
With the reel system assembled and straps or buckles now installed on the cover material, it’s time to attach everything together:
1. Ensure the reel axle is parallel to the pool’s length and positioned to allow the cover to feed smoothly on/off without rubbing on any pool components.
2. Take the straps or buckles at the end of the cover and secure them to the winding mechanism of the axle using the included attachment hooks, grommets, or receivers depending on your model.
3. With the straps connected but the cover still unrolled, slowly turn the crank and watch for any uneven bunching or tight spots that could affect even rolling. Adjust strap tension as needed.
4. Continue turning the crank to fully roll up the solar cover onto the axle, ensuring even spacing between the straps as you work your way down the length.
Step #4: Testing and Using the Reel
Before using the reel system, do a few test rolls of extending and retracting the cover to ensure smooth operation. When deploying the cover, pull it fully out without tugging or jerking which can damage the track. When retracting, turn the crank steadily to roll it back up evenly.
If you notice any issues like loose straps, uneven rolling, or the cover catching on obstacles, make adjustments to the system as needed. Consult the manufacturer’s instructions for any troubleshooting guidance.
With some basic maintenance like occasional cleaning of the components, your new solar pool cover reel system will provide years of effortless cover management and maximize the benefits of heat retention and water conservation.