How to Reset Renogy Charge Controller | A Step-by-Step Guide
Renogy charge controllers are essential components in solar energy systems, regulating the flow of power from solar panels to batteries. Sometimes, these controllers may encounter issues or require a reset. There are two ways to do so. You can do it using the charge controller and another one by using the charge controller device.
This guide will provide you with clear and concise instructions on how to reset your Renogy charge controller, ensuring optimal performance and efficiency.
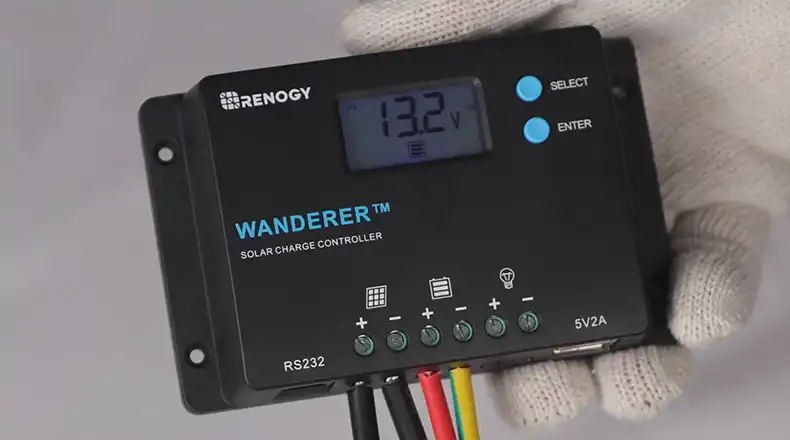
Ways to Reset Renogy Solar Charge Controller
Before we dive into the nitty-gritty, let’s get one thing straight: resetting your Renogy solar charge controller isn’t as daunting as it might sound. In fact, there are a couple of straightforward methods you can try. Let’s explore them together!
By Using Solar Charge Controller
Alright, let’s start with the most straightforward method – resetting directly from the charge controller itself. It’s like giving your solar system a little vacation and then bringing it back to work refreshed.
Here’s how you do it:
- Disconnect the solar panels: First things first, we need to cut off the power source. Unplug the cables connecting your solar panels to the charge controller. It’s like telling your controller, Hey buddy, take a breather!
- Disconnect the battery: Next up, disconnect the cables leading to your battery. This step ensures that there’s no residual power flowing through the system.
- Wait it out: Give your charge controller a minute or two to completely power down. You’ll know it’s off when the screen goes blank. It’s like watching your controller take a quick power nap.
- Reconnect in reverse order: Time to wake up your system! Start by reconnecting the battery cables. Then, hook up your solar panel cables. It’s important to do this in the right order to avoid any potential issues.
- Power up: Once everything’s connected, your charge controller should power back up. The screen will light up, and voila! You’ve just successfully reset your Renogy solar charge controller.
This method works like a charm for most Renogy models. It’s simple, doesn’t require any special tools, and gets the job done. Plus, it’s kind of satisfying to watch your system come back to life, isn’t it?
By Using the Renogy Charge Controller App
Now, let’s talk about the tech-savvy way to reset your Renogy charge controller. If you’re lucky enough to have one of the newer models, like the Rover Li 40 Amp MPPT Solar Charge Controller, you’ve got a nifty app-based option at your fingertips.
Here’s how you can reset your controller using the Renogy BT app:
- Download the app: First things first, head to your device’s app store and download the Renogy BT app. It’s free and user-friendly, so no worries there.
- Connect your device: Once you’ve got the app installed, it’s time to connect your charge controller. Make sure your phone’s Bluetooth is turned on, and follow the app’s instructions to pair with your controller.
- Navigate to Device Info: After you’re connected, you’ll see a menu of options. Look for Device Info and tap on it. It’s like opening up your controller’s digital diary.
- Reset to Factory Default: Within the Device Info section, you’ll find an option that says Reset Factory Default. This is your golden ticket to a fresh start.
- Confirm and wait: The app will likely ask you to confirm that you want to reset. Once you do, give it a moment to work its magic. Your controller will reboot with its original factory settings.
This method is super convenient if you’re comfortable with apps and prefer a more high-tech approach. Plus, it’s a great way to familiarize yourself with your controller’s digital interface.
Why Reset a Solar Charge Controller?
Resetting your solar charge controller can resolve various issues, such as:
Restoring Default Settings
Incorrect configurations or settings may occasionally cause controller issues. Returning the charge controller to its factory default settings helps ensure proper operation.
Troubleshooting Issues
A hard reset can help to get rid of temporary faults or software glitches. The issues might be the cause of your charge controller acting irregularly, or not operating at all.
Overcoming Unresponsiveness
Due to system glitches or power fluctuations, the charge controller could occasionally stop functioning. This can be fixed with a reset, which will put the controller back online.
With RESET Button
For the charge controllers featuring a reset button, the process is rather simple and similar to regular controllers.
Step 1: Disconnect the solar panels from the charge controller.
Step 2: Find the RESET button on the front or back panel of the controller.
Step 3: Use a paperclip or a similar tool to press and hold the RESET button for approximately five seconds.
Step 4: Release the RESET button. The PWM charge controller will now be reset.
Step 5: Reconnect the solar panels.
Why Did My Renogy Charge Controller Stop Working?
The charge controller may shut down or cease to function if its rated capacity is exceeded. A Renogy charge controller’s functionality may be hampered by faulty or sloppy connections. Secure the security and good connection of each connection. Extreme temperatures, water leakage, or moisture can damage the charge controller.
In rare cases, internal components may fail, leading to the charge controller’s malfunction. If the reset doesn’t resolve the issue, contact Renogy’s customer support for further assistance.
To Conclude
To ensure optimal performance and prolong its lifespan, regularly check your charge controller and perform resets as needed. Make sure to follow the manufacturer’s guidelines and safety precautions while handling the charge controller and solar power system components.

