How To Identify And Replace Damaged Solar Panel Diodes?
Identifying and replacing damaged solar panel diodes is crucial for maintaining optimal system performance. Diodes play a vital role in protecting solar panels and ensuring efficient energy production.
However, when these components fail, they can significantly impact the overall output of your solar array. This guide will walk you through the process of spotting faulty diodes, testing their functionality, and safely replacing them if necessary.
By understanding these key maintenance tasks, you can keep your solar panels operating at peak efficiency and extend the lifespan of your investment.
Whether you’re a DIY enthusiast or a professional installer, knowing how to troubleshoot diode issues is an essential skill for anyone working with solar technology.
What are Solar Panel Diodes?
Solar panel diodes are small but crucial components that play a vital role in the functionality and efficiency of photovoltaic systems.
Before we dive into the process of identifying and replacing damaged diodes, it’s important to understand their purpose and the different types used in solar panels.
Purpose And Function
Solar panel diodes serve two primary functions:
Bypass diodes:
These are the most common type found in solar panels. They allow current to flow around shaded or damaged cells, preventing hot spots and maintaining overall panel output.
Blocking diodes:
These are typically used in older systems or certain configurations to prevent reverse current flow from the battery back to the solar panels at night.
Diodes act as one-way valves for electricity, allowing current to flow in only one direction. This characteristic is essential for protecting solar cells and optimizing energy production under various conditions.
Types Of Diodes Used In Solar Panels
The most common types of diodes used in solar panels are:
Schottky diodes:
These are preferred for their low forward voltage drop and fast switching speed. The samples mention specific models like 80SQ045 and 15SQ045.
Silicon diodes:
While less common in modern panels, these may be found in older systems.
Pellet diodes:
These are mentioned in the samples as being less effective due to limited heat dissipation capabilities.
Understanding the type of diode used in your solar panels is crucial when it comes time for replacement or troubleshooting.
Signs of Faulty Solar Panel Diodes
Identifying a faulty diode early can prevent further damage to your solar panel and maintain system efficiency. Here are several indicators that suggest a diode might be malfunctioning:
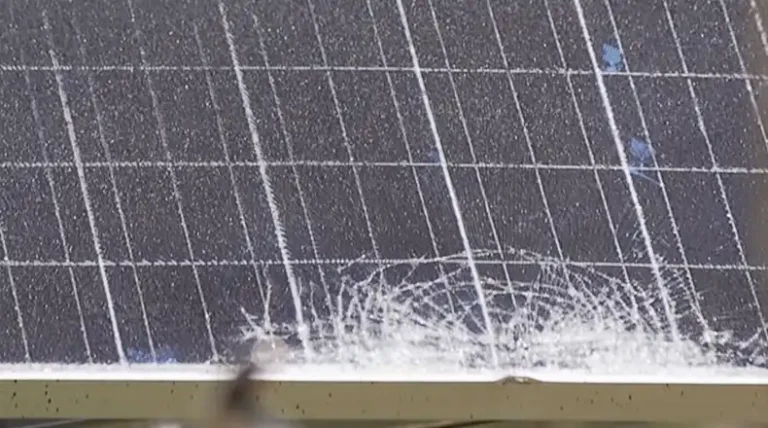
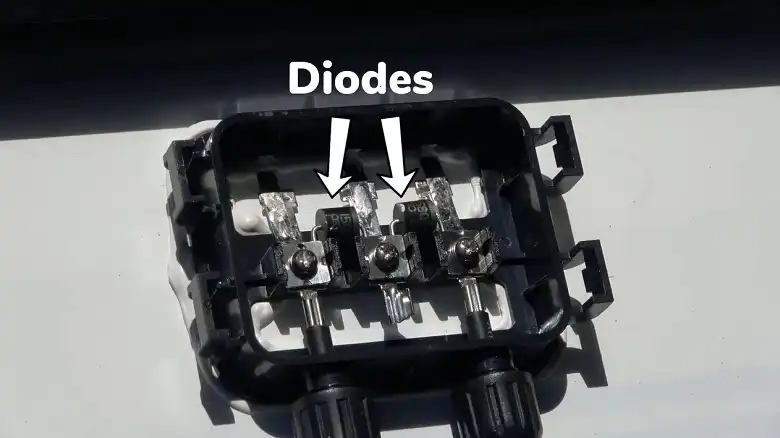
1. Visual Inspection
One of the first steps in identifying a faulty diode is a thorough visual inspection:
- Look for physical damage on the diode itself, such as cracks or discoloration.
- Check the junction box for signs of overheating or melting.
- Inspect the surrounding area for any burn marks or other indications of excessive heat.
2. Reduced Panel Output
A significant drop in your solar panel’s performance can be a sign of diode failure:
- Monitor your system’s output regularly to spot any unexpected decreases.
- Compare the output of individual panels if possible, as a single panel with a faulty diode may underperform compared to others in the array.
3. Thermal Imaging Results
Using a thermal camera can reveal hotspots that may indicate a faulty diode:
- Scan the panel during operation to identify any areas with abnormally high temperatures.
- Pay particular attention to the junction box area where diodes are located.
4. Voltage And Current Testing
Electrical testing can provide more definitive evidence of diode failure:
- Measure the voltage across each string of cells in the panel.
- Check for unexpected voltage drops or irregularities that may indicate a diode problem.
- Perform current tests to ensure proper flow and detect any anomalies.
By being attentive to these signs, you can quickly identify potential diode issues and take appropriate action to maintain your solar panel’s efficiency.
Testing Solar Panel Diodes
Once you’ve identified potential signs of diode failure, it’s important to conduct specific tests to confirm the issue. Here are several methods to test solar panel diodes:
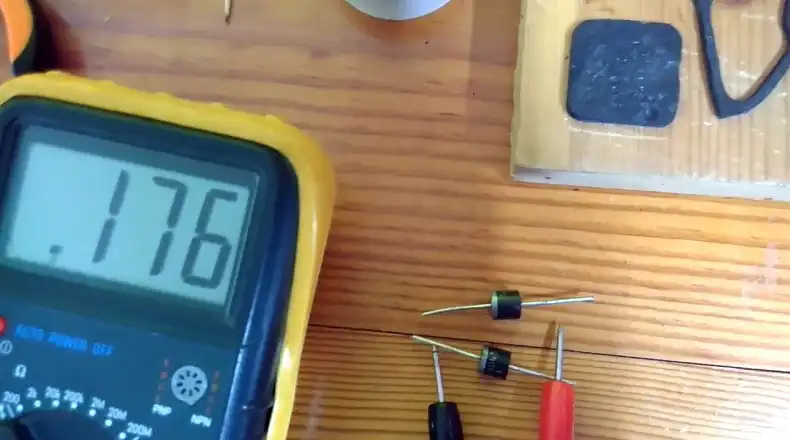
1. Voltage Drop Test
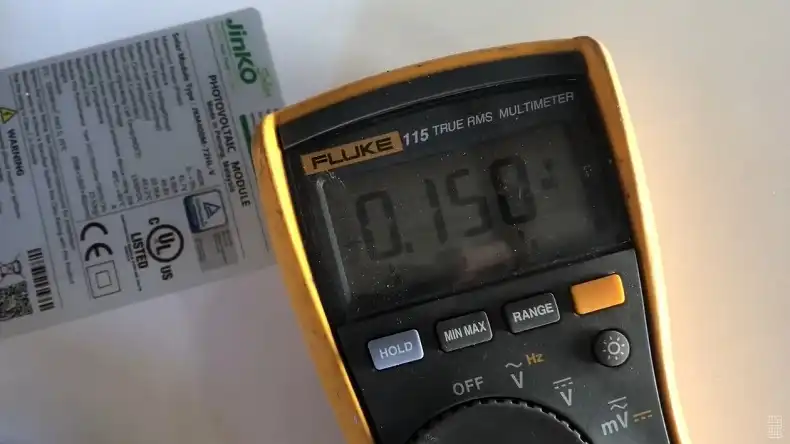
- Use a multimeter to measure the voltage drop across the diode.
- A functional diode should show a small forward voltage drop (typically 0.2-0.4V for Schottky diodes).
- If the voltage drop is significantly higher or lower, it may indicate a problem.
2. Current Flow Test
- Check for reverse current flow using a multimeter set to measure current.
- A properly functioning diode should only allow current to flow in one direction.
- Any measurable current in the reverse direction suggests a faulty diode.
3. IV Curve Analysis
- Use specialized equipment to generate an IV (current-voltage) curve for the panel.
- Compare the curve to the manufacturer’s specifications.
- Irregularities in the curve can indicate diode issues or other panel problems.
4. Shadow Test
- Partially shade one section of the panel and monitor the output.
- With functional bypass diodes, the output should only decrease proportionally to the shaded area.
- If the output drops significantly more than expected, it may indicate a faulty bypass diode.
Replacing Damaged Diodes
If testing confirms a faulty diode, replacement may be necessary. Here’s a general guide to replacing damaged diodes:
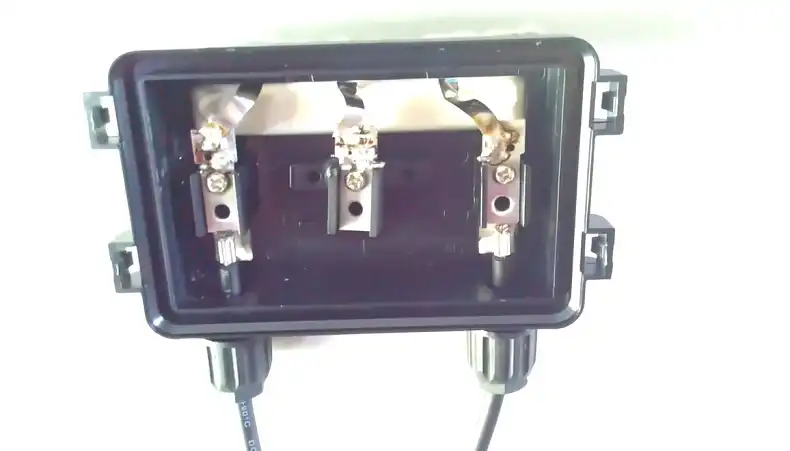
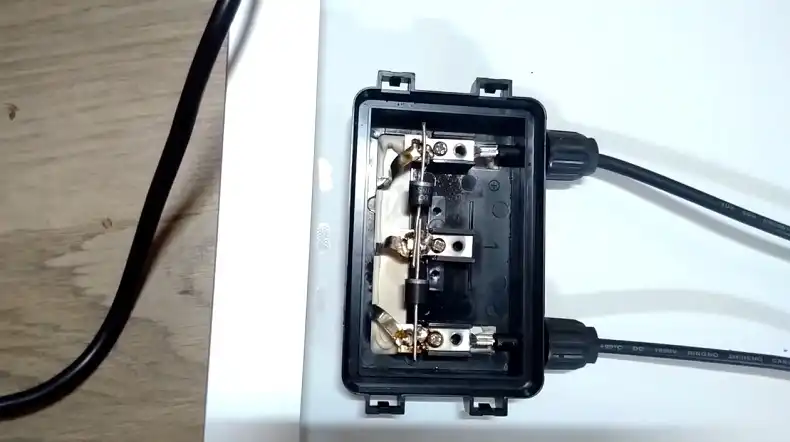
1. Accessing The Junction Box
- Locate the junction box on the back of the solar panel.
- Carefully remove any covers or sealants protecting the box.
- For modern panels with sealed junction boxes, you may need to cut a rectangular area around the diode as described in the sample.
2. Removing The Old Diode
- Use a fine flathead screwdriver to carefully remove filler material around the diode.
- Heat the solder connections with a soldering iron.
- Gently remove the faulty diode once the solder melts.
3. Soldering In The New Diode
- Clean the solder pads thoroughly.
- Place the new diode in position, ensuring correct orientation.
- Solder the new diode in place, being careful not to overheat surrounding components.
- The sample suggests using 30A diodes (30SQ030) as replacements.
4. Resealing The Junction Box
- Fill the area around the new diode with fire-rated silicone.
- Replace any plastic covers that were removed.
- Apply additional fire-rated silicone over the cover for extra protection.
Remember to test the new diode before fully sealing the junction box to ensure proper installation and functionality.
Preventative Measures
Taking proactive steps can help prevent diode failures and extend the life of your solar panels:
Regular system inspections
- Conduct visual inspections of your panels and junction boxes periodically.
- Monitor system performance to catch any unexpected drops in output early.
- Consider annual professional inspections for larger systems.
Proper installation practices
- Ensure correct polarity when connecting panels to prevent reverse current issues.
- Use appropriate surge protection devices to guard against electrical spikes.
- Follow manufacturer guidelines for panel mounting and wiring.
Using quality components
- Choose solar panels from reputable manufacturers with reliable diodes.
- When replacing diodes, use high-quality components rated for solar applications.
- Consider upgrading to more efficient diode types if compatible with your system.
Conclusion
Identifying and replacing damaged solar panel diodes is a crucial skill for maintaining the efficiency and longevity of your photovoltaic system.
By understanding the signs of diode failure, conducting proper tests, and following careful replacement procedures, you can address issues promptly and minimize power losses.
Regular inspections and preventative measures can also help avoid diode problems in the first place.
While some DIY enthusiasts may feel comfortable performing these tasks, it’s important to recognize when professional help is needed, especially for complex systems or if you’re unsure about any step in the process.