How To Run PV Wire From Rooftop To Shed?
Running PV wire from your rooftop solar array to a shed or other structure requires careful planning and adherence to electrical codes. There are several methods to accomplish this task, each with its own advantages and considerations.
The key to a successful installation is choosing the right combination of wire types, conduit, and routing options that comply with local requirements while providing a safe and efficient connection between your panels and electrical components.
This article will explore various approaches to running PV wire, including attic and exterior routes, conduit choices, roof penetration methods, and essential components like rapid shutdown systems.
By understanding these options and following best practices, you can ensure a proper and code-compliant solar wire installation for your DIY solar project.
Planning Your PV Wire Run
Before you start running PV wire from your rooftop solar panels to your shed, it’s crucial to plan your wire run carefully. This planning stage will help ensure a smooth installation process and compliance with local electrical codes.
Assessing Your Setup
Take a close look at your specific situation. Consider the distance between your solar panels and the shed, the roof structure, and any obstacles that might affect your wire routing. Make note of potential entry points into the shed and any existing electrical components that need to be integrated with your solar system.
Considering Local Electrical Codes
Electrical codes can vary significantly between jurisdictions, so it’s essential to familiarize yourself with your local requirements. In the United States, most areas follow some version of the National Electrical Code (NEC), but there may be additional local regulations. Pay particular attention to:
- Rapid shutdown requirements
- Conduit specifications
- Grounding and bonding rules
If you’re unsure about any aspect of the code, consult with a local licensed electrician or your area’s Authority Having Jurisdiction (AHJ).
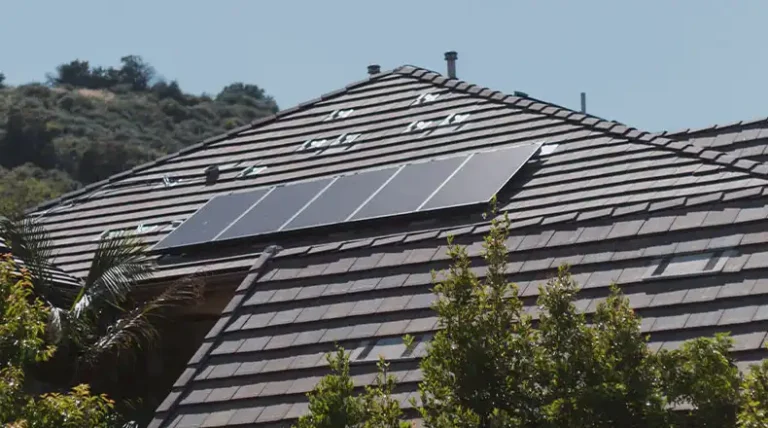
Choosing Between Attic And Exterior Routes
There are typically two main options for routing your PV wire: through the attic or along the exterior of your building. Each has its pros and cons:
Attic route:
- Provides protection from the elements
- May be easier to access for future maintenance
- Requires proper sealing of roof penetrations
Exterior route:
- Often simpler to install
- Avoids potential issues with attic heat
- May be more visible and require additional weatherproofing
Consider these factors in light of your specific situation to determine the best route for your PV wire run.
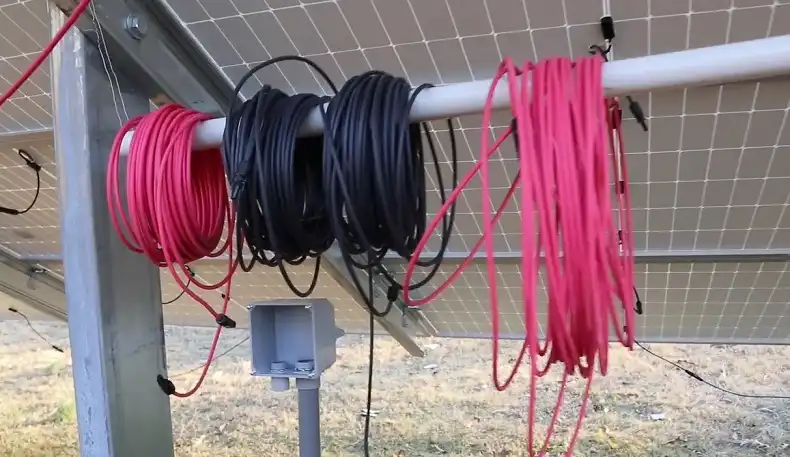
Wire Types and Conduit Options
Choosing the right wire and conduit is crucial for a safe and code-compliant installation. Let’s explore the options available and when to use each.
PV Wire Specifications
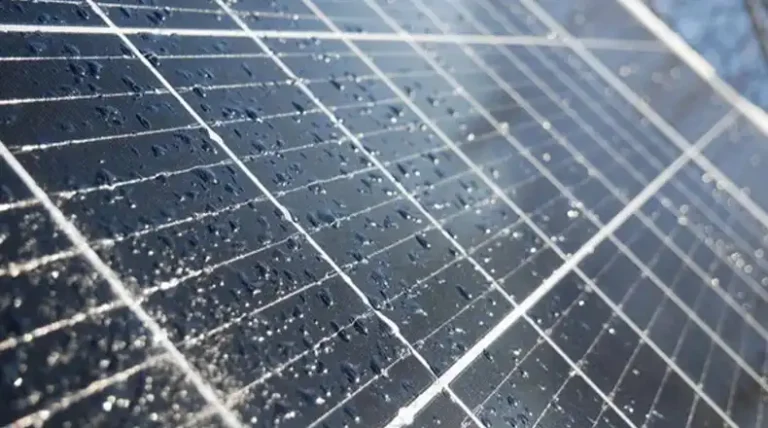
PV wire is specifically designed for use in solar installations. It’s typically dual-rated for wet and dry locations and can withstand high temperatures and UV exposure. When selecting PV wire, look for:
- USE-2 rating per UL 854
- RHH/RHW-2 rating per UL 44
- PV rating per UL 4703
These ratings ensure the wire can handle the demanding conditions of a rooftop solar installation.
Transitioning to THWN-2 wire
While PV wire is required for exposed portions of your solar array, you can transition to less expensive THWN-2 wire once you’re inside a conduit. This transition typically occurs at a combiner box or pass-through box near the array.
Metal conduit vs. PVC conduit
The choice between metal and PVC conduit depends on your specific installation and local code requirements:
Metal conduit:
- Required for most interior runs
- Provides better protection against physical damage
- Can act as an equipment grounding conductor
PVC conduit:
- Often preferred for underground runs
- Less expensive and easier to work with
- Requires a separate equipment grounding conductor
In many cases, you may use a combination of both types, using metal conduit where required and transitioning to PVC for underground portions of the run.
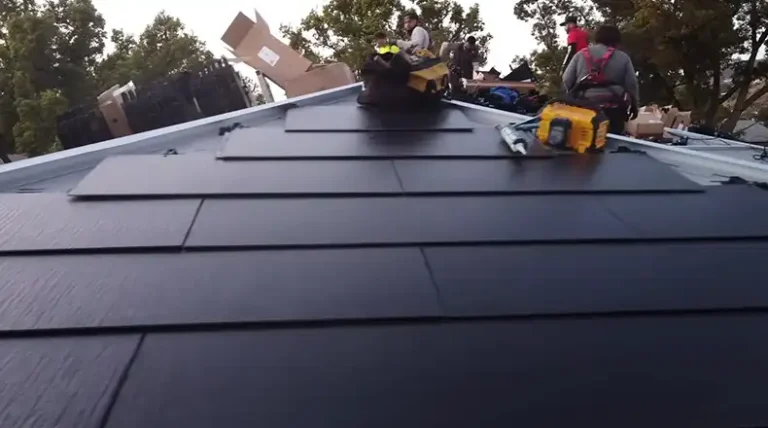
Roof Penetration Methods
Properly penetrating your roof is critical to maintain its waterproof integrity while allowing your PV wires to enter the building. Here are some common methods:
Using Weatherhead Or Pass-Through Boxes
Weatherheads and pass-through boxes provide a secure and weatherproof entry point for your PV wires. These devices are designed to prevent water ingress and often include built-in flashing for easy integration with your roofing material.
Roof Jacks And Flashing Options
For simpler installations, you might use a roof jack (also called a pipe boot) combined with appropriate flashing. This method involves drilling a hole through the roof decking and using the jack and flashing to create a watertight seal around your conduit.
Sealing And Weatherproofing
Regardless of the method you choose, proper sealing is crucial. Use high-quality roofing sealant around all penetrations and ensure that your flashing is correctly installed according to the manufacturer’s instructions and roofing best practices.
Routing Options
Once you’ve penetrated the roof, you have several options for routing your PV wire to the shed. Let’s explore each in more detail.
Through Attic And Interior Walls
If you’re taking the attic route, you’ll run your conduit through the attic space and then down through interior walls to reach your electrical components.
This method keeps the wiring protected from the elements but requires careful planning to avoid obstacles and maintain proper support for the conduit.
Along Exterior Walls
For an exterior route, you’ll run conduit along the outside of your building. This method is often simpler but requires proper securing of the conduit and consideration of aesthetic impact. Use appropriate conduit straps and ensure all connections are weathertight.
Underground To Shed
If your shed is detached from the main building, you’ll likely need to run a portion of your conduit underground. For this section:
- Use PVC conduit rated for direct burial
- Bury the conduit at the depth required by local codes (typically 18-24 inches)
- Consider using warning tape above the conduit to prevent future digging damage
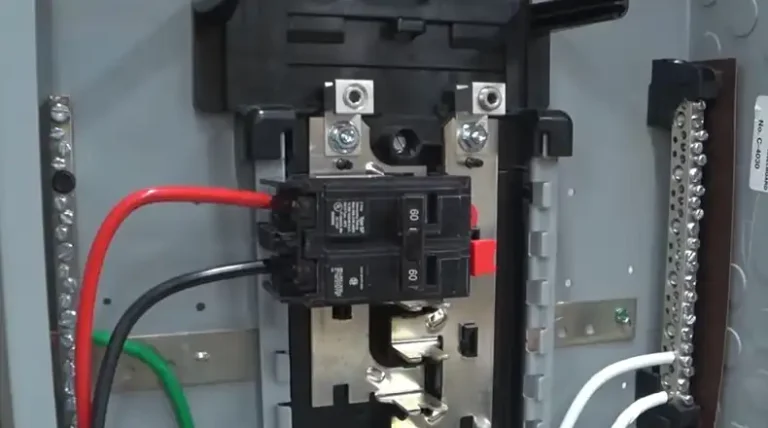
Required Components
In addition to wire and conduit, several other components are crucial for a proper PV wire installation:
Combiner Or Pass-Through Boxes
These boxes serve as transition points between your PV wire and THWN-2 wire, and provide a location for making connections between multiple strings of panels if needed.
Rapid Shutdown Systems (If Applicable)
Many jurisdictions now require rapid shutdown capability for solar systems. This typically involves installing a rapid shutdown box near the array and a controller near your main service panel.
Flexible Conduit Options
While rigid conduit is preferred for most of the run, flexible options like MC cable or flexible metal conduit can be useful for navigating tight spaces or making final connections to equipment.
Installation Steps
With all your components selected and your route planned, you’re ready to begin installation. Here’s a high-level overview of the process:
Mounting Boxes And Components
Start by installing your combiner box, rapid shutdown components, and any other required boxes. Ensure these are securely mounted and properly weatherproofed.
Running Conduit
Install your conduit along the planned route, using appropriate fittings and support methods. Pay special attention to proper sealing at all junction points and roof penetrations.
Pulling Wire
Once your conduit is in place, pull your wires through. Use appropriate pulling techniques and lubricant if needed to avoid damaging the wire insulation.
Safety Considerations and Code Compliance
Throughout the installation process, keep these key safety and compliance factors in mind:
Rapid Shutdown Requirements
Ensure your system includes the necessary components to meet rapid shutdown requirements, typically within 10 feet of the array.
Grounding And Bonding
Proper grounding and bonding are crucial for safety. Follow code requirements for grounding your array, conduit, and other metal components.
Protecting Wires From Physical Damage
Use appropriate methods to protect your wires from potential physical damage, especially in areas where they might be subject to impact or environmental stress.
Final Words
Running PV wire from your rooftop solar array to a shed involves careful planning, adherence to electrical codes, and attention to detail in installation.
By choosing the right combination of wire types, conduit, and routing options, you can create a safe and efficient connection between your panels and electrical components.
Remember to always prioritize safety and compliance with local regulations throughout the process.
If you’re ever in doubt about any aspect of the installation, don’t hesitate to consult with a professional solar installer or licensed electrician. With proper planning and execution, your DIY solar project can provide clean, renewable energy for years to come.
Frequently Asked Questions
1. Can PV Wire Be Run In Conduit?
Yes, PV wire can be run in conduit. When installing PV wire in conduit, the conduit must be properly sized based on the diameter of the conductor as specified by the manufacturer to ensure safe and efficient installation.
2. Can PV Wire Be Direct Buried?
Yes, PV wire can be direct buried. These wires are designed to be sunlight resistant and are approved for direct burial, making them suitable for outdoor and high-temperature applications without the need for additional conduit protection.
3. What Kind Of Conduit Do You Use For Solar Panels?
For solar panels, Rigid Metal Conduit (RMC) is commonly used. This type of conduit provides excellent protection against physical damage and is durable enough to withstand outdoor conditions, ensuring the safety and longevity of the wiring.
4. What Is The Conduit For PV Systems?
In a PV system, conduit serves as a protective pathway for electrical wires, shielding them from environmental elements such as moisture, UV radiation, and physical damage. It ensures that the system remains safe and operational over time.
5. How Deep Do Solar Panel Wires Need To Be Buried?
Solar panel wires need to be buried between 24 inches (60 cm) and 36 inches (90 cm) deep, depending on local codes and regulations. This depth provides sufficient protection from physical damage and environmental exposure.