PWM Solar Charge Controllers Error Codes And Basic Troubleshooting Guidelines
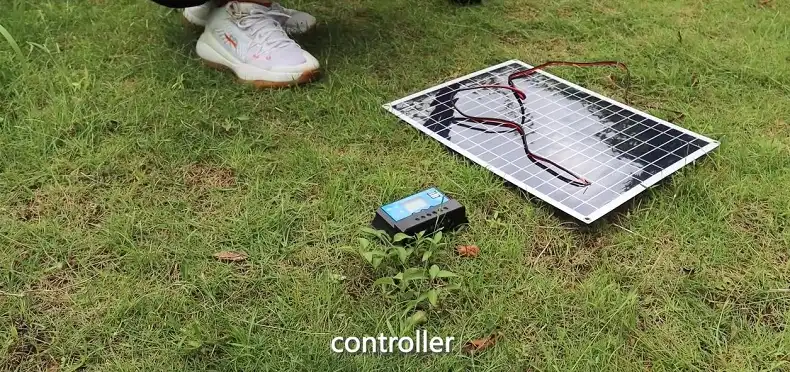
PWM solar charge controllers play a crucial role in maintaining the health and efficiency of solar power systems.
As a key component in both residential and off-grid setups, these controllers regulate the charging process of batteries, preventing overcharging and extending battery life.
However, like any electronic device, PWM charge controllers can encounter issues, often indicated by error codes or unusual behavior.
Understanding these codes and knowing how to troubleshoot common problems is essential for anyone relying on solar energy.
This comprehensive guide will walk you through the most frequent error codes, provide step-by-step troubleshooting procedures, and offer practical solutions to keep your solar system running smoothly.
Whether you’re a DIY enthusiast or a professional installer, this information will help you maintain and optimize your PWM solar charge controller’s performance.
Understanding PWM Solar Charge Controllers
Pulse Width Modulation (PWM) solar charge controllers are essential components in many solar power systems. They serve as the intermediary between solar panels and batteries, ensuring efficient charging and protecting batteries from damage.
Before diving into troubleshooting, it’s important to understand the key features and operation of these devices.
Key Features
PWM charge controllers offer several important features that contribute to their effectiveness:
- Automatic system voltage recognition (12V/24V)
- Multiple battery type support (sealed, GEL, flooded lead-acid, and lithium)
- Three-stage charging algorithm
- Temperature compensation
- Various load working modes
- Overcharge, over-discharge, and short-circuit protection
- LCD display for easy monitoring
How They Work
PWM controllers work by rapidly switching the connection between the solar panels and the battery on and off. This pulsing action allows the controller to maintain the optimal charging voltage for the battery.
As the battery approaches full charge, the controller reduces the duty cycle of the pulses, gradually tapering off the charging current to prevent overcharging.
Common Error Codes and Their Meanings
PWM solar charge controllers typically use error codes to indicate various issues within the system. Understanding these codes can help you quickly identify and address problems. Here’s a table of common error codes and their meanings:
| Error Code | Meaning |
| E0 | No error |
| E1 | Battery over-discharging |
| E2 | Battery overvoltage |
| E3 | Under voltage warning |
| E4 | Load short circuit |
| E5 | Load overcurrent |
| E6 | Controller inner temperature over heat |
| E8 | Charging current too high |
| E10 | Solar panel input voltage too high |
Recognizing these error codes is the first step in diagnosing issues with your solar charge controller. However, it’s equally important to know how to troubleshoot these problems effectively.
Troubleshooting PWM Solar Charge Controllers
When your PWM solar charge controller isn’t functioning as expected, following a systematic troubleshooting process can help identify the root cause of the problem. Let’s explore the basic steps you should take.
Basic PWM Solar Charge Controller Troubleshooting Steps
Before diving into specific issues, it’s wise to perform some general checks:
- Verify that the controller is receiving power from the battery (9-14 volts).
- Check the inline fuse between the battery and the controller.
- Inspect all connections to ensure they’re secure and corrosion-free.
- If the controller is in an error state, try a soft reset by holding down all buttons for 15 seconds.
- If a soft reset doesn’t work, perform a hard reset by disconnecting all wires for 15-20 minutes, then reconnecting them.
Connection Checks
Proper connections are crucial for the smooth operation of your solar charge controller. Here’s what to look for:
- Battery Connection: Ensure the battery is correctly connected to the controller. The battery voltage should be between 9-14 volts for the controller to operate.
- Solar Panel Connection: Check that the solar panels are properly connected to the controller. In sunlight, you should measure 18-20 volts across the panel leads (this may be lower on cloudy days).
- Load Connection: If applicable, verify that any loads are correctly connected to the controller’s load output terminal and that the current doesn’t exceed the controller’s rated current.
Voltage Measurements
Using a multimeter to take voltage measurements can provide valuable insights:
- Battery Voltage: Measure the voltage at both the battery terminals and the controller’s battery terminals. These readings should be very close if the correct wire gauge is being used.
- Solar Panel Voltage: Measure the voltage at the controller’s PV terminals. This should be close to the solar array’s operating voltage (VMP) as specified in the panel’s datasheet.
- Load Voltage: If there’s no output to the load, check the voltage at the load terminals when the load is supposed to be on.
Specific Issues and Solutions
Now let’s address some common specific issues you might encounter with your PWM solar charge controller.
LCD Display Problems
If you’re experiencing issues with the LCD display, try these solutions:
- No Display: Check the battery connection and voltage. The controller needs at least 9 volts to operate.
- Incomplete or Non-updating Display: This could be due to low ambient temperature. The display should recover as the temperature rises.
- Three Dashes on Display: This is a known bug in some controllers. Try performing a hard reset as described earlier.
Charging Issues
If your controller isn’t charging the batteries properly, consider these potential causes and solutions:
- Zero Charging Current: Ensure the batteries aren’t already full. Check that solar panels are clean and in direct sunlight. Verify the input voltage from the solar panels.
- Controller Flashing: This may indicate a very high charging rate. Consider increasing your battery bank capacity or using some of the input current for loads.
- Incorrect Charging Voltage: Verify that the correct battery type is selected in the controller settings.
Load Output Problems
Issues with the load output can often be resolved with these steps:
- No Output: Check if the controller is in a time-controlled mode. The load may turn on automatically after a set delay.
- Flashing Load Icon: This usually indicates an overload or short circuit. Reduce the load or check for short circuits, then reset the controller.
- Intermittent Output: Ensure all connections are secure and that the load current doesn’t exceed the controller’s rating.
Maintenance and Best Practices
To keep your PWM solar charge controller functioning optimally, follow these maintenance tips and best practices:
- Regular Inspections: Periodically check all connections for tightness and signs of corrosion.
- Keep It Clean: Ensure the controller and its surroundings are free from dust and debris.
- Proper Ventilation: Install the controller in a well-ventilated area to prevent overheating.
- Battery Maintenance: Fully charge your batteries regularly, at least once a month.
- System Sizing: Ensure your solar panels, batteries, and loads are appropriately sized for your controller.
- Firmware Updates: If your controller supports it, keep its firmware up to date.
Final Words
PWM solar charge controllers are robust devices, but like any electronic equipment, they can encounter issues.
By understanding common error codes, following systematic troubleshooting steps, and maintaining your system properly, you can ensure the longevity and efficiency of your solar power system.
Remember, when in doubt, consult your controller’s manual or seek advice from a professional. With proper care and attention, your PWM solar charge controller will continue to be the reliable heart of your solar power system for years to come.
Frequently Asked Questions
1. How Do I Reset My PWM Solar Controller?
To reset your PWM solar controller, hold down all four buttons on the front of the controller for 15 seconds. This action will reset the controller to its default settings, allowing you to reconfigure it as needed.
2. How To Know If A Solar Charge Controller Is Faulty?
To determine if a solar charge controller is faulty, start by reading the controller’s LED display for any error codes or unusual indicators.
You can also use a multimeter to measure the power output from the controller to ensure it is delivering the correct voltage and current to the batteries. If the readings are significantly off or if the controller isn’t showing any signs of activity, it may be faulty.
3. What Does B01 Mean On A Solar Controller?
The code “b01” on a solar controller typically indicates that the battery is disconnected. This means the controller is not detecting a connection to the battery bank, and you should check the battery cables and connections to ensure they are secure and properly attached.
4. How To Troubleshoot A Charge Controller?
To troubleshoot a charge controller, start by checking all connections to ensure they are secure and correctly installed. Next, review the controller’s LED display or digital readout for any error codes. Use a multimeter to check the voltage from the solar panels and the output to the batteries.
If the readings are incorrect or if the controller shows no signs of operation, try resetting the controller. If problems persist, consult the user manual or contact the manufacturer for further assistance.
5. What Is The Lifespan Of A Solar Charge Controller?
The lifespan of a solar charge controller is typically about 15 years. This can vary depending on the quality of the controller, environmental conditions, and how well it is maintained. Regular inspections and proper care can help maximize the controller’s longevity.

![[ANSWERED] What Size Charge Controller for 1200W Solar Panel?](https://www.itekenergy.com/wp-content/uploads/2023/07/What-Size-Charge-Controller-for-1200W-Solar-Panel-768x428.webp)
