PWM Solar Charge Controller Settings Explained
Setting up a PWM solar charge controller correctly is crucial for the efficiency and longevity of your solar power system.
While installing the controller is an important step, adjusting its settings to match your specific battery type and system requirements is equally vital.
Different batteries need different settings, and failing to configure your controller properly can lead to reduced battery life, decreased system efficiency, and even potential safety hazards.
In this comprehensive guide, we’ll walk you through the essential settings for PWM solar charge controllers, covering everything from basic voltage parameters to specific configurations for various battery types.
Whether you’re working with lithium, lead-acid, or AGM batteries, we’ll provide you with the knowledge you need to optimize your solar charging system and get the most out of your renewable energy investment.
Basic Settings of PWM Solar Charge Controllers
Before diving into the specifics of setting up your PWM solar charge controller, it’s essential to understand the basic parameters that you’ll be working with.
These settings form the foundation of your controller’s operation and directly impact the performance and longevity of your battery system.
Battery Floating Charging Voltage
The floating charging voltage is a crucial setting that maintains your battery at full charge while preventing overcharging. For a 12V system, this voltage is typically set around 13.7V.
If you’re working with a 24V system, you’d aim for about 27.4V, and for a 48V system, approximately 58.4V. This voltage keeps your battery topped up without causing damage from excessive charging.
Battery Over-Discharging Protection Voltage
To protect your battery from deep discharges that can shorten its lifespan, the over-discharging protection voltage is set. For a 12V system, this usually falls between 10.8V and 11.4V.
The 24V and 48V systems would use proportionally higher values. This setting ensures that your battery doesn’t discharge beyond a safe level, preserving its overall health and capacity.
Battery Overcharging Protection Voltage
Also known as the full charge cutoff voltage, this setting prevents your battery from receiving too much charge. For a 12V system, it’s typically set between 14.1V and 14.5V.
Again, 24V and 48V systems would use proportionally higher values. This setting is crucial for preventing battery damage and potentially dangerous situations caused by overcharging.
Charge Controller Capacity and Maximum Charging Current
The charge controller capacity refers to the maximum amount of current the controller can handle, often ranging from 10A to 100A. The maximum charging current, on the other hand, is determined by your solar panel output.
It’s important to ensure that your controller’s capacity exceeds the maximum current your panels can produce.
System Voltage
This setting refers to the operational voltage of your solar power system, typically 12V, 24V, or 48V. Larger systems might operate at higher voltages like 110V or 220V. Ensuring your controller is set to the correct system voltage is crucial for proper operation.
Setting Up Your PWM Solar Charge Controller
Now that we’ve covered the basic settings, let’s walk through the process of setting up your PWM solar charge controller.
Connecting the Battery First
One of the most critical steps in setting up your solar charge controller is connecting the battery first. This allows the controller to recognize the battery voltage and configure itself accordingly.
If you connect the solar panels or load before the battery, the controller might misinterpret the voltage and configure itself incorrectly.
Wiring Considerations
When connecting your system, it’s important to use the appropriate wire gauge. For most PWM controllers, 10 to 14 gauge wire is suitable. The specific gauge depends on the current your system will be handling. Remember, the lower the gauge number, the thicker the wire and the more current it can safely carry.
Connecting Solar Panels and Load
After the battery is connected and the controller is powered on, you can proceed to connect your solar panels and load. The controller should have clearly marked terminals for these connections. Always double-check your connections to ensure they’re secure and correctly placed.
Adjusting Settings for Different Battery Types
Different battery chemistries require different charging parameters. Let’s look at the settings for some common battery types used in solar systems.
Lithium Battery Settings
For lithium batteries, particularly Lithium Iron Phosphate (LiFePO4), you’ll need to adjust several settings:
- Disable temperature compensation as lithium batteries don’t require it.
- Turn off equalization settings, as lithium batteries don’t need equalization.
- Set the charge voltage to 14.4V (for a 12V system).
- Adjust the absorption time to about 30 minutes.
- Set the float voltage to 13.6V.
Lead-Acid Battery Settings
Lead-acid batteries are often the default setting for many charge controllers. However, it’s still important to verify and adjust the settings:
- Enable temperature compensation.
- Set the equalization voltage (typically around 14.4V for a 12V system).
- Adjust the float voltage to about 13.5V (for a 12V system).
- Set the absorption voltage to around 14.4V (for a 12V system).
AGM Battery Settings
AGM (Absorbed Glass Mat) batteries have slightly different requirements:
- Set the maximum charge current to no more than 50A per 100Ah of battery capacity.
- Adjust the absorption voltage to 14.6V and float voltage to 13.5V (for a 12V system).
- Set the equalization voltage to 14.4V.
Important Voltage Settings
Beyond the basic settings, there are several other voltage parameters that you may need to adjust for optimal performance.
Absorption Voltage and Duration
The absorption voltage is the voltage at which the battery is held during the bulk charging phase. The duration can be set to adaptive (adjusting based on the battery’s needs) or fixed. For most systems, an adaptive setting works well.
Equalization Settings
Equalization is a controlled overcharge that helps balance the cells in lead-acid batteries. For lithium batteries, this should be disabled. For lead-acid batteries, you’ll need to set the equalization voltage, duration, and frequency.
Float Voltage
After the battery is fully charged, the float voltage maintains the charge while preventing overcharging. This is typically set to around 13.5V for a 12V system.
Temperature Compensation
This setting adjusts the charging parameters based on battery temperature. It’s crucial for lead-acid batteries but should be disabled for lithium batteries.
Specific Settings for 12V, 24V, and 48V Systems
While we’ve primarily discussed settings for 12V systems, it’s important to note that 24V and 48V systems will require proportionally higher voltage settings. Always refer to your battery manufacturer’s recommendations for the most accurate settings.
Tips for Optimal Performance
To get the most out of your PWM solar charge controller, keep these tips in mind:
- Regularly monitor your system’s performance and adjust settings if necessary.
- Ensure your controller is rated for your system’s voltage and current.
- Keep your controller in a cool, dry place to prevent overheating.
- Clean your solar panels regularly to maintain optimal charging efficiency.
- Check and tighten all connections periodically to prevent voltage drops and ensure safety.
Conclusion
Setting up a PWM solar charge controller correctly is crucial for the efficiency and longevity of your solar power system.
By understanding and properly configuring the basic settings, adjusting parameters for your specific battery type, and following best practices for installation and maintenance, you can ensure that your solar charging system operates at peak performance.
Remember, while these guidelines provide a solid starting point, always refer to your specific battery and controller manufacturer’s recommendations for the most accurate settings.
With the right setup, your PWM solar charge controller will help you harness the sun’s energy efficiently and reliably for years to come.
Frequently Asked Questions
1. How Do I Reset My PWM Charge Controller?
To reset your PWM charge controller, hold down all four buttons on the front of the controller for 15 seconds. This should reset the controller to its factory settings, allowing you to reconfigure it as needed.
2. How To Work A PWM Solar Charge Controller?
A PWM (Pulse Width Modulation) solar charge controller works by making a direct connection between the solar array and the battery bank. It regulates the voltage from the solar panels to ensure the batteries are charged safely and efficiently, preventing overcharging while maintaining a steady charge.
3. What Are The Disadvantages Of A PWM Solar Charge Controller?
One of the main disadvantages of a PWM solar charge controller is that it produces less power when there is no direct sunlight or when the solar panels are shaded.
Unlike MPPT controllers, PWM controllers are less efficient in converting the available solar energy, especially under less-than-ideal conditions.
4. How To Reboot A Charge Controller?
To reboot a charge controller, disconnect the batteries from the charge controller by removing the battery wires.
This will cut off the power supply to the controller, effectively rebooting it. After a few moments, reconnect the battery wires to restart the controller.
5. How Do I Know If My Solar Charge Controller Is Charging?
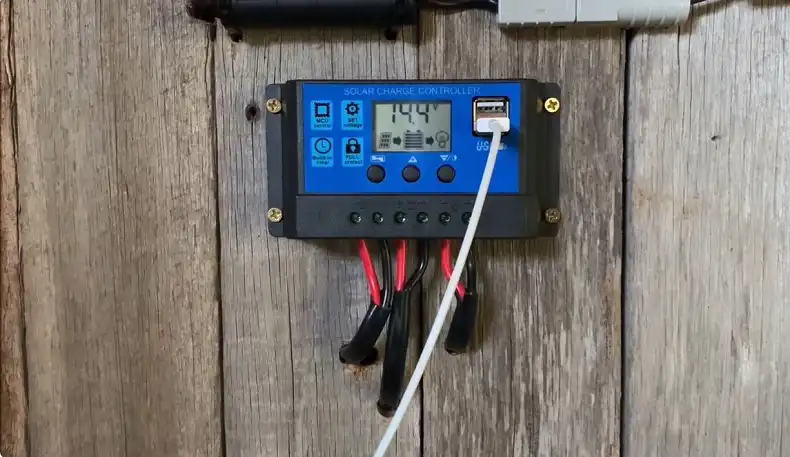
Most solar charge controllers have LED lights or digital displays that indicate the charging status.
These indicators typically show whether the controller is actively charging the batteries, if the batteries are fully charged, or if there is an issue with the charging process.
Check the controller’s manual for specific details on what each light or display reading means.