6 X Solar Panel Setup Guide
If you’re considering a 6-panel solar system for your home or small business, you’re on the right track! A 6-panel setup can produce enough energy to offset a substantial portion of your electricity usage, depending on your location and daily consumption. Typically, a 6-panel system generates around 1,500 to 2,500 kWh per year, which can cover essential appliances like refrigerators, lighting, and electronics for small households. This guide will walk you through everything you need to know, from planning and equipment selection to installation and optimization, to help you build your own solar energy system.
The Benefits of a 6-Panel Solar System
A 6-panel solar setup is an ideal starting point for those who want to invest in renewable energy without committing to a full-scale installation. This type of system is cost-effective and scalable, making it perfect for residential use or small commercial applications.
With an average power output of around 1.5 kW, a 6-panel system can:
- Reduce your electricity bill significantly.
- Act as a reliable backup during power outages if paired with a battery.
- Lower your carbon footprint by producing clean, renewable energy.
To put it into perspective, a 6-panel setup will generate enough power to run basic household items like lights, fans, and some kitchen appliances, depending on your local sunlight conditions. For example, in areas with high sunlight like California or Florida, a 6-panel system can produce up to 2,500 kWh annually, while in cloudier regions like Seattle, the output might be closer to 1,500 kWh per year.
The Components of a 6-Panel Solar Setup
Solar Panels: Choosing the Right Type
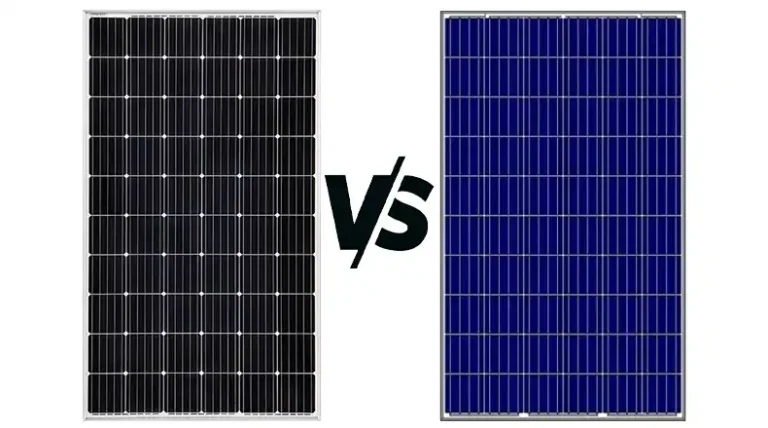
When it comes to choosing the right panels for a 6-panel system, the two most common types are monocrystalline and polycrystalline:
- Monocrystalline Panels: These are known for their high efficiency and longer lifespan. They convert around 18-22% of sunlight into electricity. For a 6-panel system, this type might cost around $1,500-$2,000.
- Polycrystalline Panels: Slightly less efficient, with a 15-17% conversion rate. However, they are more affordable, making them a popular choice for budget-conscious users. Expect to pay around $1,200-$1,600 for a 6-panel setup.
Mounting Systems: Roof vs. Ground
Mounting systems are crucial for securing your panels. The two main types include:
- Roof Mounts: Ideal for homes with adequate roof space and good sun exposure. Ensure that your roof is structurally sound to support the weight. Roof mounts typically cost $500-$1,000, depending on the complexity.
- Ground Mounts: Useful if roof space is limited or unsuitable. This setup allows for optimal panel placement and tilt, but requires more land. Expect to pay $1,500-$2,500 for a ground mounting system.
Inverters: Converting DC to AC
Inverters are vital for converting the DC power generated by your panels into usable AC electricity. The two main types are:
- String Inverters: Best for uniform sunlight conditions. They can be cost-effective, ranging from $500 to $1,200 for a 6-panel setup.
- Microinverters: Ideal if shading is an issue, as they optimize each panel individually. These are more expensive at around $1,500-$2,000.
Wiring and Connectors: Safety and Efficiency
The wiring should be carefully planned, as incorrect wiring can lead to inefficiency and safety risks. Choose high-quality MC4 connectors and 10 AWG (American Wire Gauge) cables to ensure minimal power loss and long-term durability.
Charge Controllers (if off-grid)
If you’re setting up an off-grid system, a charge controller is necessary to prevent battery overcharging. Choose between PWM (Pulse Width Modulation) or MPPT (Maximum Power Point Tracking) controllers:
- MPPT Controllers: More efficient, especially in cold weather, but costlier ($150-$300).
- PWM Controllers: Cheaper ($50-$100), suitable for small systems.
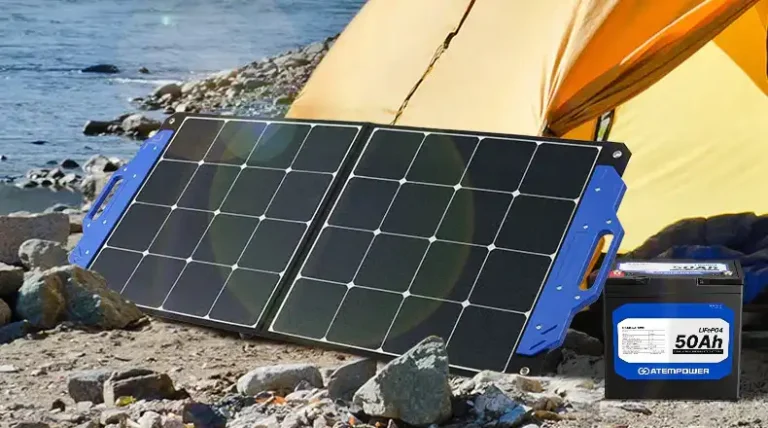
Battery Storage (Optional)
Adding a battery can store excess energy for nighttime or cloudy days. For a 6-panel system, consider a lithium-ion battery like the Tesla Powerwall, which can store up to 13.5 kWh but costs around $6,500. Cheaper options include lead-acid batteries, but these require more maintenance.
Monitoring Systems: Real-Time Tracking
Monitoring systems allow you to track the performance of your setup. Platforms like Enphase Enlighten or SolarEdge Monitoring provide real-time data on energy production, consumption, and efficiency. Most monitoring systems for a small setup cost around $200-$500.
Planning Your 6-Panel Solar Installation
Calculating Power Needs
First, determine your household’s daily energy consumption. The average U.S. household consumes around 30 kWh per day. A 6-panel system producing 7-10 kWh/day can offset about 20-30% of your energy usage.
Site Assessment: Checking Roof or Ground Space
Use tools like Google Project Sunroof or Solar Pathfinder to evaluate roof space, tilt, and shading. For optimal efficiency, a south-facing roof with a tilt angle equal to your latitude is recommended.
System Sizing and Configuration
A typical 6-panel setup with 300W panels will produce 1.8 kW (300W x 6 panels). Multiply this by average sun hours in your area (e.g., 5 hours/day) to estimate daily output (1.8 kW x 5 hours = 9 kWh/day).
Step-by-Step Solar Panel Setup Guide
Step 1: Preparation and Safety
Before you start, gather essential tools like drills, wrenches, and safety gear (e.g., gloves, harnesses, goggles). Always turn off the power supply when working with electrical components.
Step 2: Installation of the Mounting System
For roof mounts, mark the locations of rafters and drill pilot holes. Attach the mounting brackets and ensure they’re secure. Ground mounts should be anchored using concrete foundations.
Step 3: Placing and Securing the Panels
Position each panel carefully, ensuring they are free from shading. Use appropriate bolts and clamps to secure them to the mounting system.
Step 4: Wiring and Electrical Connections
Connect the panels using MC4 connectors. If connecting in series, link the positive terminal of one panel to the negative of the next. For parallel, connect all positives together and all negatives together.
Step 5: Inverter and Electrical System Integration
Install the inverter close to the panels and connect the DC wires from the panels. Attach the AC output to your main electrical panel or battery storage system.
Step 6: Testing and Commissioning
Check all connections and measure voltage to ensure the system is working. Turn on the inverter and monitor the output. If connected to the grid, schedule an inspection with your utility provider.
Bonus Step: Optimizing Your 6-Panel Solar Setup for Maximum Efficiency
For the best efficiency, keep your panels clean and free of debris. Consider seasonal tilt adjustments to maximize sun exposure. Monitoring systems can help you identify any issues like shading or dirt buildup.
Cost Analysis and ROI for a 6-Panel Solar Setup
Here’s a breakdown of the estimated costs:
| Component | Cost (USD) |
| Solar Panels | $1,500 – $2,000 |
| Inverter | $500 – $1,200 |
| Mounting System | $500 – $1,000 |
| Wiring & Connectors | $150 – $300 |
| Installation (DIY) | $0 |
| Installation (Pro) | $1,000 – $2,500 |
| Total | $3,650 – $7,000 |
With an annual energy production of 1,500-2,500 kWh, you can save $200-$400 per year, depending on electricity rates.