How To Calculate The Optimal Size Of A Solar Panel System For Your Home?
Thinking about making the switch to solar power? You’re not alone. More and more homeowners are harnessing the sun’s energy to reduce their carbon footprint and slash their electricity bills.
But before you start shopping for solar panels, you need to figure out the right size system for your home. It’s not as simple as slapping a few panels on your roof and calling it a day.
The key to maximizing your solar investment lies in careful calculations and considerate planning. In this guide, we’ll walk you through the step-by-step process of determining the optimal size for your solar panel system.
By the end, you’ll have a clear understanding of how to calculate your energy needs, assess your solar potential, and choose the right equipment for your home. Let’s dive in and shed some light on sizing your solar system!
1. Understanding Your Energy Needs
Before you can determine the size of your solar panel system, you need to have a clear picture of how much energy your home consumes. This is the foundation of your solar sizing journey, so let’s break it down into manageable steps.
Calculate Your Daily kWh Usage
The first step in understanding your energy needs is to calculate your daily kilowatt-hour (kWh) usage. This might sound technical, but don’t worry – it’s simpler than you think.
Gather Your Utility Bills:
Start by collecting your electric bills from the past 12 months. Why a full year? Because your energy usage can vary significantly between seasons. You might crank up the AC in summer or rely more on heating in winter.
Find Your Monthly kWh Usage:
Look for the “kilowatt-hours used” or “kWh used” on each bill. This number represents your energy consumption for that month.
Calculate Your Average Monthly Usage:
Add up the kWh usage from all 12 months and divide by 12. This gives you your average monthly energy consumption.
Determine Your Daily Usage:
Take your average monthly usage and divide it by 30 (or 365 and multiply by 12 if you prefer to work with annual figures). This will give you your average daily kWh usage.
For example, if your average monthly usage is 900 kWh: 900 kWh ÷ 30 days = 30 kWh per day
Remember, this is an average. Your actual daily usage will fluctuate, but this gives us a solid starting point for sizing your solar system.
Consider Future Energy Consumption
While understanding your current energy usage is crucial, it’s also wise to think about your future needs. Are there any changes on the horizon that could impact your energy consumption?
- Home Additions or Renovations: Planning to add a room or finish your basement? These changes could increase your energy needs.
- New Appliances: Thinking about getting an electric vehicle or switching to an electric heating system? Factor in the additional energy these will require.
- Family Changes: A growing family often means growing energy needs. If you’re expecting additions to your household, consider how this might affect your consumption.
- Energy Efficiency Improvements: On the flip side, if you’re planning to upgrade to more energy-efficient appliances or improve your home’s insulation, this could reduce your future energy needs.
2. Assessing Your Solar Potential
Now that you have a clear picture of your energy needs, it’s time to evaluate how much solar energy you can potentially harness.
This involves looking at your location, the amount of sunlight you receive, and the specifics of your property. Let’s break it down.
Determine Peak Sun Hours
The amount of sunlight your location receives plays a crucial role in determining the size of your solar system.
We measure this in “peak sun hours” – the average number of hours per day when solar irradiance reaches 1000 watts per square meter.
Use Solar Insolation Maps:
The National Renewable Energy Laboratory (NREL) provides maps showing average daily sun hours across the United States. Find your location on these maps to get a general idea of your peak sun hours.
Consider Seasonal Variations:
Remember that sun hours can vary significantly between summer and winter. In many parts of the U.S., you might get 5-6 peak sun hours in summer but only 2-3 in winter.
Local Weather Patterns:
Your area’s typical weather can affect sun hours. Frequent cloud cover or fog can reduce your effective sun hours.
For example, if you live in Arizona, you might average 6-7 peak sun hours per day, while in Seattle, you might only get 3-4.
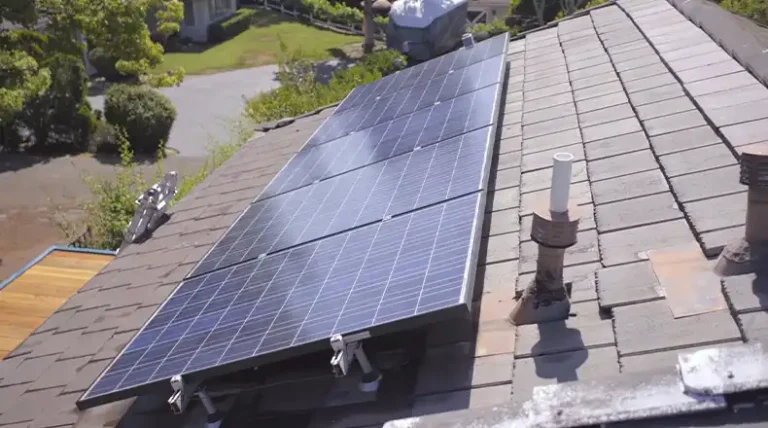
Evaluate Roof Space and Orientation
The physical characteristics of your roof play a big part in determining how many solar panels you can install and how efficient they’ll be.
Available Roof Space:
Measure the usable area of your roof. Remember, you’ll need to leave space around the edges and avoid obstructions like chimneys or vents.
Roof Orientation:
In the Northern Hemisphere, south-facing roofs are ideal for solar panels. However, east and west-facing roofs can still be viable options, though they may produce about 20% less energy than south-facing panels.
Roof Angle:
The pitch of your roof affects how much sunlight your panels can capture. The optimal angle is typically equal to your latitude, but don’t worry if your roof isn’t at this exact angle – solar panels can still be effective within a range of angles.
Shading:
Take note of any trees, buildings, or other structures that might cast shadows on your roof during different parts of the day or year. Significant shading can greatly reduce your solar potential.
3. Calculating System Size
Now that we’ve assessed your energy needs and solar potential, it’s time to put those numbers together and calculate the size of the solar system you’ll need. This step will give you a clear target for your solar installation.
Basic Formula for System Size
The basic formula for calculating your solar system size is:
(Daily kWh usage ÷ Peak sun hours) x 1.15 = Required system size in kW
Let’s break this down:
- Daily kWh Usage: This is the number we calculated in Section II. For example, let’s say it’s 30 kWh per day.
- Peak Sun Hours: This is the number we determined in Section III. Let’s use 5 hours for this example.
- The 1.15 Factor: This accounts for system losses and ensures your system will produce enough even on less-than-ideal days.
So, using our example numbers:
(30 kWh ÷ 5 hours) x 1.15 = 6.9 kW system
This means you’d need approximately a 7 kW solar system to cover your energy needs.
Accounting for Efficiency Factors
While the basic formula gives us a good starting point, there are several efficiency factors we need to consider to fine-tune our calculation:
Panel Efficiency:
Not all solar panels are created equal. More efficient panels can produce more power in the same amount of space. For example, if you’re using panels with 20% efficiency instead of 15%, you might be able to reduce your system size by about 25%.
Inverter Efficiency:
Inverters, which convert the DC power from your panels to AC power for your home, typically have an efficiency rate of 95-98%. Factor this into your calculations.
Temperature Effects:
Solar panels become less efficient as they heat up. In very hot climates, you might need to increase your system size by 10-15% to account for this.
Roof Orientation and Angle:
If your roof isn’t ideally oriented or angled, you might need to increase your system size to compensate. For example, west-facing panels might need to be 20% larger than south-facing ones to produce the same amount of energy.
Incorporating these factors, our 7 kW system might actually need to be closer to 8 kW to ensure it meets your energy needs under real-world conditions.
Choosing the Right Solar Equipment
Once you’ve calculated the size of the solar system you need, the next step is selecting the right equipment. The efficiency and quality of your solar panels and inverters can significantly impact your system’s performance, so it’s crucial to make informed choices.
Solar Panel Efficiency and Wattage
Solar panels come in a range of efficiencies and wattages. Here’s what you need to know:
Panel Efficiency:
This refers to how much of the sun’s energy the panel can convert into electricity. Most residential solar panels have efficiencies between 15% and 22%. Higher efficiency panels are more expensive but can produce more power in a smaller space.
Panel Wattage:
This is the power output of the panel under standard test conditions. Residential panels typically range from 250 to 400 watts. Higher wattage panels mean you’ll need fewer panels to reach your target system size.
Quality vs. Cost:
While it might be tempting to go for the cheapest option, remember that your solar system is a long-term investment. Higher quality panels often come with better warranties and degrade more slowly over time.
For example, if you need a 7 kW system, you could use:
- 18 panels at 400 watts each
- 23 panels at 300 watts each
The choice often depends on your available roof space and budget.
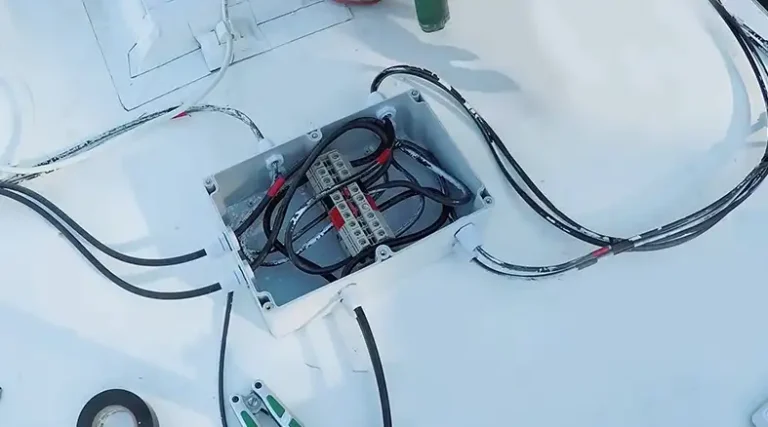
Inverter Options
Inverters are crucial components that convert the DC electricity produced by your panels into AC electricity used in your home. There are three main types to consider:
String Inverters:
These are the traditional choice and usually the most cost-effective. They work well for simple installations with consistent sunlight across all panels. However, if some panels are shaded or facing different directions, the performance of the entire string can be reduced.
Microinverters:
These are installed on each individual panel. They’re more expensive but allow each panel to operate independently, which can increase overall system efficiency, especially if you have partial shading or complex roof angles.
Power Optimizers:
These are a middle ground between string inverters and microinverters. They’re installed on each panel to optimize its output, but still send power to a central string inverter.
Choosing between these options depends on your specific situation:
- If you have a simple, unshaded south-facing roof, a string inverter might be your best bet.
- If you have partial shading or panels facing different directions, microinverters or power optimizers could be worth the extra cost.
Remember, the efficiency of your inverter also plays a role in your overall system performance. Look for inverters with efficiency ratings of 95% or higher.
When selecting your equipment, it’s also worth considering future expansion. If you think you might want to add more panels in the future, ensure your inverter can handle additional capacity.
Choosing the right equipment is crucial for maximizing the performance and longevity of your solar system. While it might be tempting to cut costs here, remember that quality components can lead to better performance and reliability over the 25+ year lifespan of your system.
Additional Considerations
As we wrap up our guide to sizing your solar system, there are a few more important factors to consider. These can impact both the size of your system and its overall effectiveness.
Budget Constraints
While we’ve focused on sizing your system based on energy needs, your budget will likely play a role in your final decision. Here’s how to approach this:
- Determine Your Budget: Set a realistic budget for your solar investment. Remember, this is a long-term investment that can save you money over time.
- Get Multiple Quotes: Reach out to several reputable solar installers for quotes.
- Consider Financing Options: Solar loans, leases, and power purchase agreements (PPAs) can make solar more accessible if you don’t have the full amount upfront.
- Balance System Size and Cost: If your ideal system size is beyond your budget, consider starting with a smaller system that covers part of your energy needs. Many systems are designed to be expandable in the future.
- Factor in Long-Term Savings: Remember to consider the long-term electricity savings when evaluating the cost. A slightly larger upfront investment might lead to greater savings over time.
Local Regulations and Incentives
Local rules and financial incentives can significantly impact your solar system design and overall cost:
- Check Local Zoning Laws: Some areas have restrictions on solar panel placement or system size. Make sure your planned system complies with local regulations.
- Understand Utility Policies: Research your utility’s net metering policy. This can affect how you’re compensated for excess energy and might influence your ideal system size.
- Explore Available Incentives: Look into federal, state, and local incentives for solar installation. These can include:
- Federal Investment Tax Credit (ITC)
- State tax credits or rebates
- Local utility incentives
- Solar Renewable Energy Credits (SRECs)
- Consider Future Policy Changes: Be aware that incentives and policies can change over time. Try to factor in any known upcoming changes to solar policies in your area.
Future-Proofing Your System
As you plan your solar installation, it’s wise to think about potential future needs:
- Electric Vehicle Charging: If you’re considering purchasing an electric vehicle in the future, you might want to size your system to accommodate the additional energy needs.
- Home Additions: If you’re planning to expand your home or add energy-intensive features like a pool, factor this into your system sizing.
- Energy Storage: While you might not be ready for a battery system now, consider leaving space for future battery installation if you think you might want to add storage later.
- Smart Home Integration: Think about how your solar system might integrate with future smart home technologies for more efficient energy management.
Professional Assessment
While this guide provides a comprehensive overview of solar system sizing, there’s no substitute for a professional assessment:
- On-Site Evaluation: A solar professional can conduct a thorough on-site evaluation, taking into account factors like roof condition, shading, and electrical system capacity.
- Custom Design: Professionals can use advanced software to create a custom system design optimized for your specific situation.
- Permitting and Paperwork: Experienced installers can navigate local permitting processes and handle necessary paperwork, saving you time and hassle.
- Warranty and Support: Professional installation often comes with warranties and ongoing support, providing peace of mind for your investment.
Conclusion
Sizing a solar system for your home involves careful consideration of your energy needs, solar potential, equipment options, and various other factors. While it might seem complex, taking the time to properly size and design your system will ensure you get the most out of your solar investment.
Remember, solar technology is a long-term investment in your home and the environment. By carefully calculating your needs, choosing quality equipment, and optimizing your system design, you can enjoy clean, renewable energy and significant savings on your electricity bills for decades to come.
Whether you decide to size your system yourself or work with a professional, the knowledge you’ve gained from this guide will help you make informed decisions and get the most out of your solar journey. Here’s to a brighter, cleaner energy future for your home!