Installing Flexible Solar Panels on RVs and Boats | Explained
Installing flexible solar panels on your RV or boat is easier than you might think. These lightweight, versatile panels conform to curved surfaces and require minimal maintenance. This article will equip you with the knowledge to assess your needs, choose the right materials, and navigate the installation process, empowering you to harness the sun’s power for a more sustainable and independent journey.
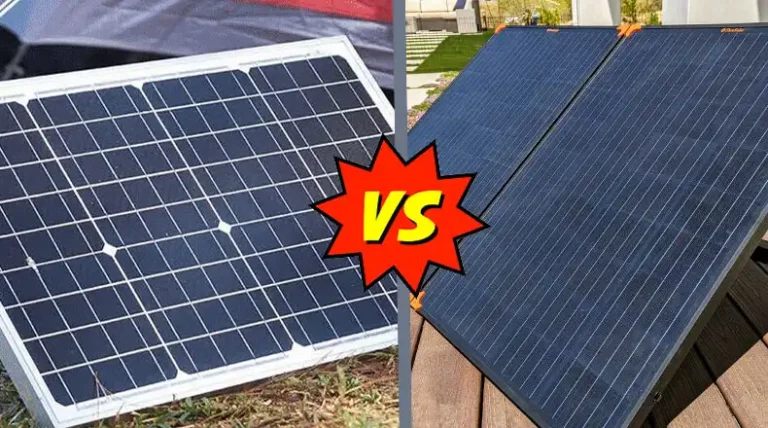
What are Flexible Solar Panels?
Flexible solar panels are a revolutionary advancement in photovoltaic technology, designed to bend and conform to various surfaces. Unlike their rigid counterparts, these panels are thin, lightweight, and can be installed on curved or irregular surfaces, making them ideal for RVs and boats.
The key differences between rigid and flexible solar panels include –
| Feature | Rigid Solar Panels | Flexible Solar Panels |
| Weight | Heavier (15-20 lbs per panel) | Lightweight (1-5 lbs per panel) |
| Thickness | 1.5-2 inches | 0.1-0.2 inches |
| Flexibility | None | Can bend up to 30 degrees |
| Efficiency | Higher (18-22%) | Lower (15-18%) |
| Durability | More durable | Less durable, but improving |
| Cost | Generally less expensive | More expensive per watt |
Different types of flexible solar panels cater to specific needs –
Solar Blankets: Portable, foldable panels perfect for temporary setups or additional power when needed.
Walk-on Panels: Durable panels designed to withstand foot traffic, ideal for boat decks.
Semi-flexible Panels: A compromise between rigidity and flexibility, offering better efficiency than fully flexible options.
What to Consider Before Installing Flexible Solar Panels on RVs and Boats?
First of all, it’s crucial to assess your energy needs, evaluate your vehicle’s compatibility, and consider budget constraints. This planning phase ensures you choose the right system for your specific requirements.
Assessment
First, list all of your electrical devices and their respective wattages. This will give you an understanding of the total power requirements of your home or business. Next, estimate the daily usage hours for each device. This will allow you to calculate the total daily energy consumption in watt-hours. By compiling this information, you can then determine the appropriate solar panel capacity needed to meet your energy needs.
Here’s a sample calculation –
| Device | Wattage | Hours Used | Daily Watt-hours |
| LED Lights | 10W | 4 hours | 40 Wh |
| Laptop | 50W | 3 hours | 150 Wh |
| Refrigerator | 60W | 24 hours | 1440 Wh |
| Total | 1630 Wh |
Based on this example, you’d need a solar system capable of generating at least 1630 Wh per day.
Budget & Cost Factors
When budgeting for your solar installation, it’s important to consider several key cost factors. First, the panels themselves can range from $1.5 to $3 per watt for flexible panels. However, your total budget should also include additional components such as charge controllers, batteries, inverters, and wiring. Another important consideration is the cost of installation. The DIY approach can save money upfront.
Installing Flexible Solar Panels on RVs and Boats
The installation process is pretty simple if you know how to do that properly. Keep reading till the end and install your flexible solar panels successfully.
Tools & Materials
- Flexible solar panels
- Adhesive (e.g., Sikaflex 252 or 3M VHB tape)
- Wire cutters and strippers
- Crimping tool and heat shrink tubing
- Multimeter
- Drill (if mounting with screws)
- Screwdriver set
- Sealant (marine-grade if for boats)
- Cleaning supplies (isopropyl alcohol, microfiber cloths)
- Measuring tape
- Marker or pencil
- Safety equipment (gloves, goggles, non-slip shoes)
- Ladder or scaffolding (for RV roof access)
Step-by-Step Installation Guide
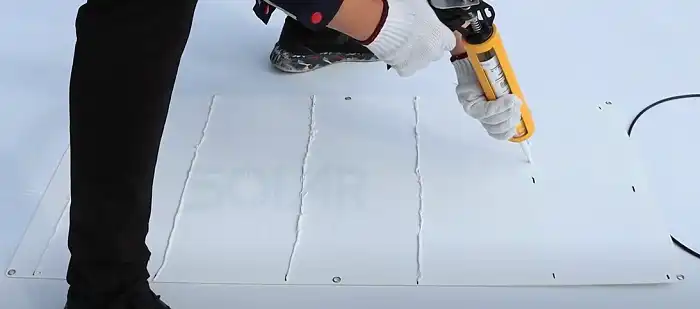
Step 1: Surface Preparation
Thoroughly clean the mounting surface using isopropyl alcohol and microfiber cloths. This removes any grease, dirt, or residue that could affect adhesion.
Allow the surface to dry completely.
Use a measuring tape and marker to outline where each panel will be placed, ensuring optimal sun exposure and avoiding obstacles like vents or antennas.
If your RV has a rubber roof, consult the manufacturer to ensure compatibility with your chosen adhesive.
Step 2: Panel Placement & Connection
Depending on your chosen method, follow these steps –
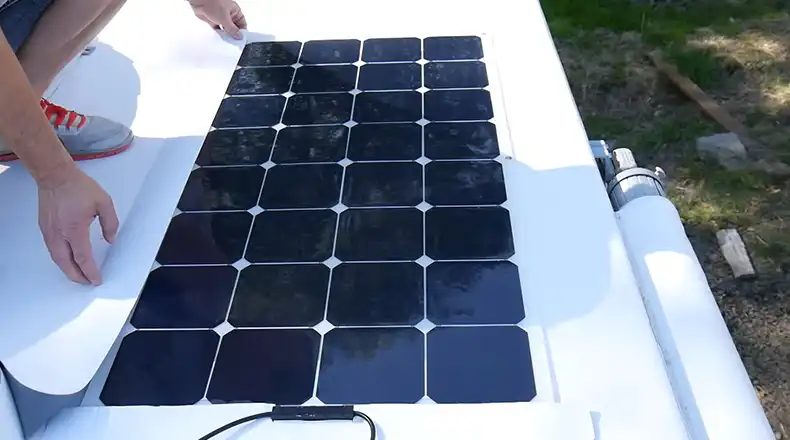
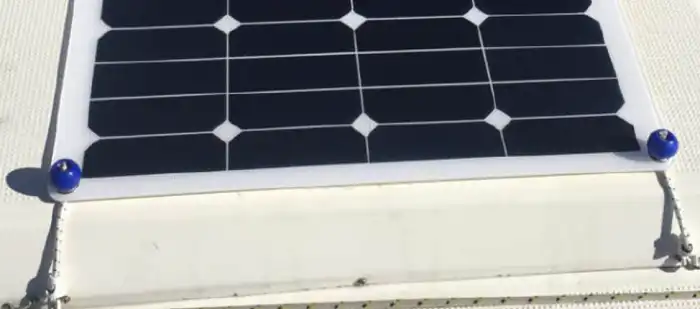
Method 1: Adhesive Installation
1. Choose a high-strength, weatherproof adhesive like Sikaflex 252 or 3M VHB tape.
2. If using Sikaflex –
- Apply a continuous bead of adhesive around the perimeter of the panel, about 1 inch from the edge.
- Ensure that the adhesive is across the back side of the panel.
- Carefully place the panel on the marked area and press firmly.
- Use painter’s tape to secure the edges while the adhesive cures (usually 24-48 hours).
3. If using VHB tape –
- Cut strips of tape to fit the perimeter and create crosshatch patterns in the center.
- Clean both the panel back and roof surface with the adhesive promoter provided with the tape.
- Remove the protective backing and carefully place the panel, pressing firmly to ensure full contact.
4. Regardless of adhesive type, leave a 0.79-inch (2 cm) gap between panels for airflow and cabling.
NOTE: This method is recommended for most flexible panels.
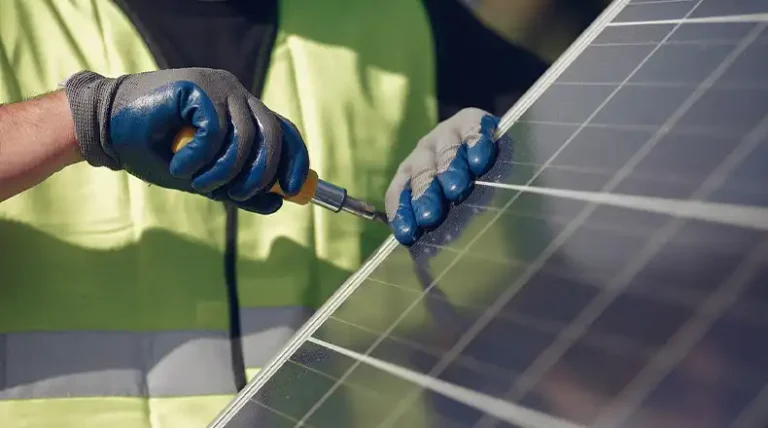
Method 2: Screw Mounting
1. Mark screw locations on your outline, ensuring they align with the panel’s mounting holes.
2. Pre-drill pilot holes, being careful not to drill through the roof.
3. Apply a generous amount of sealant to each hole.
4. Place the panel and insert stainless steel screws with rubber washers.
5. Tighten screws firmly but be careful not to over-tighten, which could damage the panel.
6. Apply additional sealant around each screw head for extra waterproofing.
NOTE: This method is recommended for semi-flexible panels or where adhesive isn’t suitable.
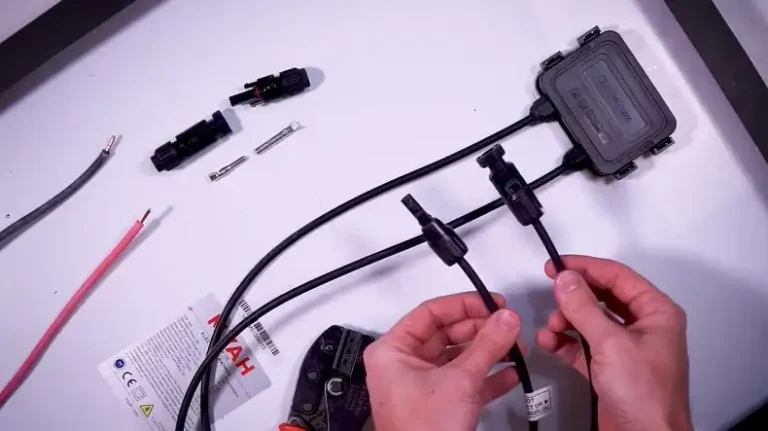
Step 3: Wiring & Electrical Connections
1. Plan your wire routing to minimize length and avoid sharp bends.
2. If needed, drill an entry point for wires, ensuring it’s properly sealed with a weatherproof cable gland or sealant.
3. Connect the panels –
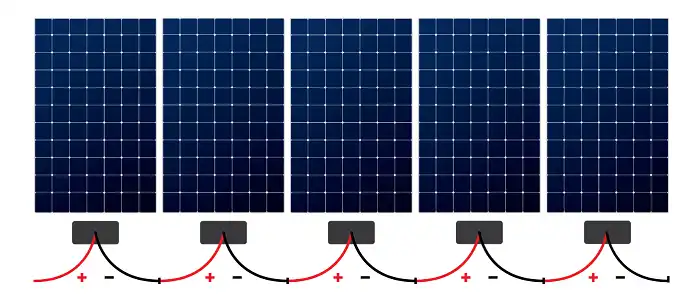
- For series connection (higher voltage): Connect the positive terminal of one panel to the negative of the next.
- For parallel connection (higher current): Connect all positive terminals together and all negative terminals together.
4. Use MC4 connectors for panel connections, ensuring they’re fully seated and locked.
5. Run the main positive and negative wires to your charge controller location.
6. Install the charge controller according to manufacturer instructions, typically near the batteries.
7. Connect the charge controller to the battery bank –
- Connect the negative wire first, then the positive.
- Use properly sized wires and fuses as specified by the charge controller manufacturer.
8. Once all connections are made, use zip ties or cable clamps to secure wires, preventing movement and chafing.
Step 4: System Testing
Double-check all connections before reconnecting the battery. Use a multimeter to verify the correct voltage at the charge controller input. Turn on the charge controller and confirm it’s recognizing the panels and charging the batteries. Finally, monitor the system over the next few days to ensure it’s functioning as expected.
Benefits of Installing Flexible Solar Panels on RVs and Boats
Investing in flexible solar panels for your RV or boat offers numerous advantages –
- Increases energy independence. You can generate your own power, reducing reliance on shore power or noisy generators.
- While initial investment can be significant, solar panels typically pay for themselves within 3-5 years through reduced energy costs.
- Solar power is clean and renewable, minimizing your carbon footprint during travel.
- Improves boondocking capabilities. You can extend your off-grid stays with a reliable power source.
- Potential for increased RV/Boat value. This solar installation can be an attractive selling point, potentially increasing resale value by 3-4%.
Conclusion
Installing flexible solar panels on your RV or boat is a game-changing upgrade that offers energy independence, cost savings, and environmental benefits. By carefully assessing your needs, choosing the right equipment, and following proper installation procedures, you can harness the power of the sun to enhance your mobile lifestyle.
Related FAQs
Can flexible solar panels withstand extreme weather conditions?
Most high-quality flexible solar panels are designed to withstand various weather conditions, including high winds and heavy rain. However, they may be more susceptible to hail damage than rigid panels. Always check the manufacturer’s specifications for weather resistance ratings.
How do I maintain my flexible solar panel system?
Maintenance is relatively simple. Regularly clean the panels with water and a soft cloth to remove dirt and debris. Check connections annually for corrosion, and inspect the panels for any signs of damage or delamination. Most systems require minimal upkeep beyond these basic steps.
Can I use flexible solar panels in conjunction with rigid panels?
You can combine flexible and rigid solar panels in a single system. This hybrid approach allows you to maximize power generation by utilizing different surfaces on your RV or boat. Ensure that your charge controller can handle the combined output and that the panels are compatible with voltage.