Pre-Installation Checklist For Solar Panels
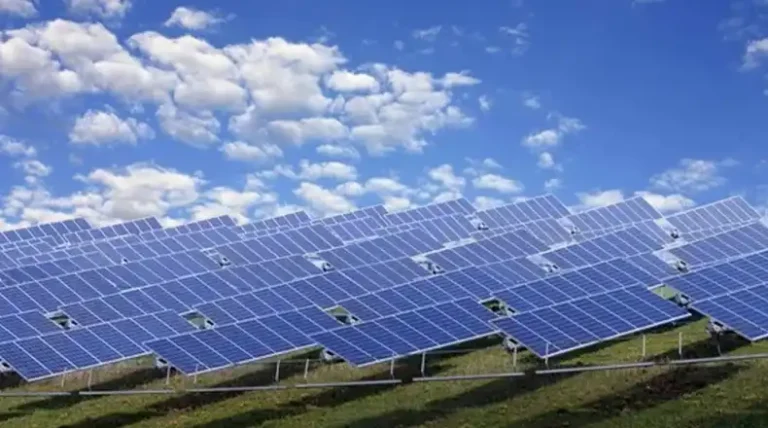
Installing solar panels is a significant step towards sustainable energy, but proper preparation is key to a successful installation.
A comprehensive pre-installation checklist ensures that every aspect of your solar project is carefully considered and planned.
From assessing your roof’s suitability to navigating local regulations, this checklist covers crucial steps that both homeowners and installers need to address before the first panel is mounted.
By thoroughly evaluating factors like energy consumption patterns, available roof space, shading issues, and financial considerations, you can set the stage for a smooth installation process and optimal system performance.
This guide will walk you through essential pre-installation tasks, helping you make informed decisions and avoid potential pitfalls as you embark on your solar energy journey.
1. Site Assessment
Understanding a homeowner’s energy needs and a property’s potential for solar power generation is essential for successful solar system design and installation. To achieve this, a comprehensive site assessment is conducted in two key stages:
Customer Consultation
The journey to solar power begins with a thorough customer consultation. This initial step is crucial for understanding the homeowner’s energy needs and expectations. During this phase:
- Review recent electricity bills to analyze energy consumption patterns. Look at both monthly and annual usage to get a comprehensive view of the household’s energy demands.
- Discuss the homeowner’s energy goals. Are they looking to offset their entire electricity bill, or just a portion? Understanding these objectives will help in designing an appropriately sized system.
- Evaluate the property’s energy efficiency. Identify areas where energy consumption can be reduced through simple upgrades like LED lighting or improved insulation.
- Address any concerns or questions the homeowner might have about solar technology, installation process, or long-term maintenance.
Technical Evaluation
Once the customer’s needs are understood, a technical evaluation of the site is necessary:
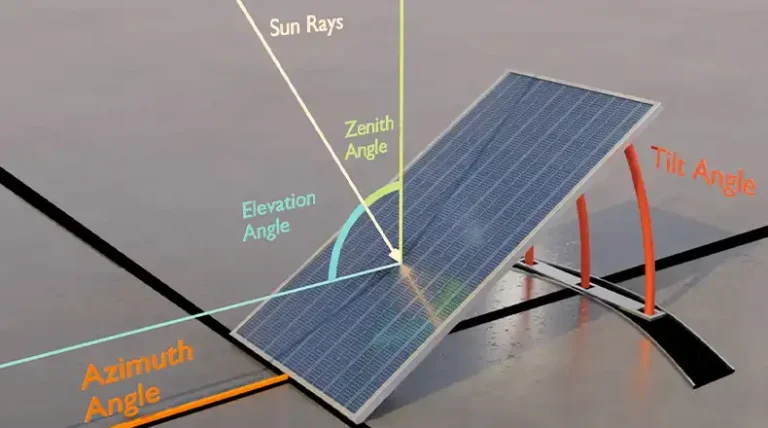
- Assess roof orientation and tilt. South-facing roofs are ideal in the Northern Hemisphere, but east-west orientations can also be viable.
- Calculate available roof space for panel installation. Consider obstructions like chimneys, vents, or skylights that might limit usable area.
- Conduct a detailed shading analysis. Use tools like sun path diagrams or specialized software to identify potential shading issues throughout the year.
- Evaluate the roof’s structural integrity. Ensure it can support the additional weight of the solar panel system.
- Identify the optimal locations for inverters, batteries (if applicable), and other system components.
2. Material Procurement and Preparation
With a clear understanding of the project’s scope, the next phase focuses on gathering the necessary components and organizing the installation process.
This involves careful planning and coordination to ensure a seamless transition to the on-site work.
Ordering Components
Proper planning in material procurement ensures that all necessary components are available when needed:
- Select high-quality, certified solar panels that meet the system’s requirements and the homeowner’s preferences.
- Choose appropriate inverters based on the system design (string inverters, microinverters, or power optimizers).
- Order mounting hardware compatible with the roof type and local weather conditions.
- Include necessary electrical components like wiring, conduits, and disconnect switches.
- Consider energy storage options if the homeowner is interested in battery backup.
Scheduling and Logistics
Efficient scheduling and logistics management are crucial for a smooth installation process:
- Coordinate delivery dates for all components to ensure they arrive before the installation date.
- Arrange for secure storage of materials if they arrive before the installation day.
- Schedule the installation during a period of favorable weather conditions.
- Inform the homeowner about the installation timeline and any preparations they need to make, such as clearing the work area.
- Coordinate with any subcontractors or specialists who may be needed during the installation.
3. Safety Considerations
Safety is paramount in the solar installation process. It requires a proactive approach to protect both the installation team and the homeowner.
Equipment and Gear
Safety should always be the top priority in solar installations:
- Ensure all installers have proper personal protective equipment (PPE), including hard hats, safety glasses, and fall protection gear.
- Inspect all ladders, scaffolding, and roof anchors before use.
- Provide appropriate tools for electrical work, including insulated gloves and voltage testers.
- Have a first aid kit readily available on the job site.
Training and Protocols
Proper training and adherence to safety protocols are essential:
- Ensure all team members are up-to-date on safety training and certifications.
- Review safety procedures specific to roof work and electrical installations.
- Establish clear communication protocols for the installation team.
- Discuss emergency procedures and ensure everyone knows the location of safety equipment.
4. Roof Evaluation
A comprehensive assessment of the roof is essential for determining the suitability of a property for solar panel installation. This involves both a structural evaluation and a detailed analysis of potential shading.
Structural Assessment
A thorough roof evaluation is crucial for a successful and safe solar installation:
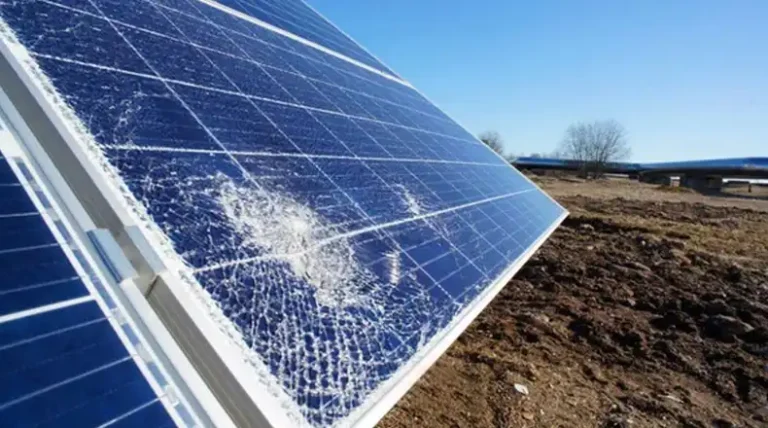
- Inspect the roof’s overall condition, looking for signs of wear, damage, or leaks.
- Assess the roof’s age and remaining lifespan. If a roof replacement is due soon, it may be wise to complete this before solar installation.
- Verify that the roof structure can support the additional weight of the solar panel system.
- Identify the type of roofing material and ensure compatibility with the chosen mounting system.
- Check for any existing warranties on the roof that might be affected by solar panel installation.
Shading Analysis
Minimizing shade on solar panels is crucial for optimal performance:
- Conduct a detailed shade analysis using tools like solar pathfinders or software simulations.
- Identify potential sources of shade, including trees, neighboring buildings, and roof features.
- Consider seasonal changes in sun position and how they might affect shading throughout the year.
- Discuss possible solutions for shade issues, such as tree trimming or adjusting panel placement.
- Explain to the homeowner how shading can impact system performance and energy production.
5. Electrical System Check
Ensuring the home’s electrical system is compatible with a solar installation is crucial for a successful and safe project.
This involves a thorough assessment of the existing electrical infrastructure and careful planning for the new system’s integration.
Existing Panel Capacity
Assessing the home’s electrical system is a critical step in solar installation planning:
- Evaluate the main electrical panel’s capacity to ensure it can handle the solar system’s output.
- Check if the panel needs an upgrade or if there’s sufficient space for a new solar breaker.
- Assess the condition of the existing electrical system, including wiring and grounding.
- Determine if any electrical code updates are necessary to accommodate the solar installation.
Wiring and Conduit Planning
Proper planning for wiring and conduit routes is essential for a clean and efficient installation:
- Map out the most direct and aesthetically pleasing route for wiring from the roof to the electrical panel.
- Identify any obstacles in the wiring path, such as HVAC systems or structural elements.
- Determine the type and size of conduit needed based on local codes and system requirements.
- Plan for any necessary penetrations through walls or roofs, ensuring proper sealing to prevent leaks.
- Consider future expansion possibilities when planning wire and conduit routes.
6. Permitting and Regulations
Navigating the complex landscape of permits and regulations is a critical step in the solar installation process. Understanding and complying with local building codes and utility requirements ensures a smooth and legal installation.
Local Building Codes
Navigating local regulations is crucial for a compliant solar installation:
- Research local building codes and zoning laws related to solar installations.
- Determine if there are any restrictions on panel placement or system size.
- Check if there are specific structural or electrical requirements for solar systems in your area.
- Understand any setback requirements or fire safety regulations that might affect the installation.
- Prepare necessary documentation for permit applications, including system designs and electrical diagrams.
Utility Requirements
Understanding and meeting utility company requirements is essential:
- Contact the local utility company to understand their interconnection process.
- Determine if there are any specific equipment requirements for grid connection.
- Understand net metering policies and how they will affect the homeowner’s electricity bills.
- Check if there are any limits on system size or output for grid-connected systems.
- Prepare necessary documentation for utility approval and interconnection agreement.
7. System Design Finalization
With the necessary information gathered and evaluated, the final system design can be developed. This involves optimizing panel placement and carefully considering inverter location to ensure maximum efficiency and performance.
Panel Layout
Optimizing the panel layout is crucial for maximizing energy production:
- Design the panel layout to maximize energy capture based on roof orientation and available space.
- Consider aesthetic factors, aiming for a visually pleasing arrangement.
- Ensure proper spacing between panels for maintenance access and to comply with fire safety codes.
- Account for any roof obstructions or vents in the layout design.
- Confirm that the proposed layout aligns with structural support capabilities of the roof.
Inverter Placement
Careful consideration of inverter placement is important for system efficiency and longevity:
- Choose an appropriate location for the inverter(s) that is easily accessible for maintenance.
- Ensure the chosen location is protected from direct sunlight and extreme weather conditions.
- Consider noise levels, especially for string inverters, when selecting placement near living areas.
- Plan for proper ventilation to prevent overheating and ensure optimal performance.
- If using microinverters or power optimizers, confirm compatibility with the chosen panel layout.
8. Pre-Installation Documentation
Thorough documentation and homeowner education are essential for a successful solar installation and a satisfied customer.
Contracts and Warranties
Proper documentation protects both the installer and the homeowner:
- Prepare a detailed contract outlining the scope of work, timeline, and payment terms.
- Clearly specify the warranties for different system components and workmanship.
- Include any performance guarantees or production estimates in the documentation.
- Provide information on maintenance requirements and any ongoing service agreements.
- Ensure all documents are clear, comprehensive, and easily understood by the homeowner.
Homeowner Education
Educating the homeowner is crucial for long-term satisfaction and system care:
- Provide a comprehensive overview of how the solar system works.
- Explain monitoring systems and how to interpret performance data.
- Discuss basic maintenance requirements and safety precautions.
- Inform about expected changes in energy bills and how to read new utility statements.
- Provide contact information for support and emergency situations.
Conclusion
A thorough pre-installation checklist is the foundation of a successful solar panel project. By carefully addressing each aspect – from site assessment and system design to permitting and documentation – you set the stage for a smooth installation process and optimal long-term performance.
This comprehensive approach not only ensures technical excellence but also builds trust with the homeowner, leading to greater satisfaction and positive referrals.
As the solar industry continues to grow, maintaining high standards in pre-installation planning will be crucial in delivering reliable, efficient, and sustainable energy solutions to homeowners across the country.