How To Properly Ground Solar Panels?
Properly grounding your solar panel system is crucial for both safety and performance. It’s not just a box to tick off during installation – it’s a vital step that protects your investment and ensures your system operates efficiently.
In this guide, we’ll walk you through the ins and outs of solar panel grounding, covering everything from basic concepts to step-by-step instructions. The most important takeaway?
Always use #6 AWG bare copper wire for outdoor grounding to meet National Electric Code requirements and pass inspections. This simple yet critical detail can save you time, money, and headaches down the road.
Whether you’re a DIY enthusiast or just want to understand the process better, this article will equip you with the knowledge you need to ensure your solar panels are grounded correctly and safely.
Understanding Grounding Requirements
Before diving into the nitty-gritty of how to ground solar panels, it’s essential to understand the requirements and regulations that govern this process.
Grounding isn’t just a good practice – it’s a legal requirement in most jurisdictions. Let’s break down the key aspects you need to know.
1. National Electric Code (NEC)
The National Electric Code (NEC) is the Bible of electrical installations in the United States. It’s updated every three years, with the most recent version released in 2020. Section 250 of the NEC specifically deals with grounding electrical systems, including solar panel installations.
Key points from the NEC:
- The code requires all non-current-carrying metal parts of the solar PV system to be grounded.
- It specifies the minimum size of grounding conductors (more on this later).
- The NEC also outlines requirements for grounding electrodes (like ground rods) and how they should be installed.
Remember, while the NEC provides national guidelines, local jurisdictions may have additional or more stringent requirements.
2. System Grounding vs. Equipment Grounding
When discussing solar panel grounding, it’s crucial to understand the difference between system grounding and equipment grounding.
System Grounding:
- This involves intentionally connecting a current-carrying conductor to the earth.
- In traditional PV systems, the DC negative conductor was often bonded to ground, but modern inverters often handle this internally.
Equipment Grounding:
- This refers to bonding all non-current-carrying metal parts to ground.
- It includes solar panel frames, racking systems, and equipment enclosures.
- The goal is to ensure that if a fault occurs, these metal parts won’t become energized and pose a shock hazard.
3. Local Building Department Regulations
While the NEC provides a national standard, local building departments often have the final say on what’s required for your specific installation. Here’s what you need to know:
- Building departments may reference different versions of the NEC, so always check which version they’re using.
- PV inspectors might interpret the NEC differently or have additional requirements.
- It’s always better to over-engineer your grounding system than to risk failing an inspection.
Pro Tip: Before starting your solar installation, contact your local building department or hire a professional consultant to ensure you understand all the local requirements. This can save you time and money in the long run.
Key Components of Solar Panel Grounding
Now that we’ve covered the regulatory landscape, let’s dive into the essential components you’ll need to properly ground your solar panel system. Each of these plays a crucial role in creating a safe and effective grounding setup.
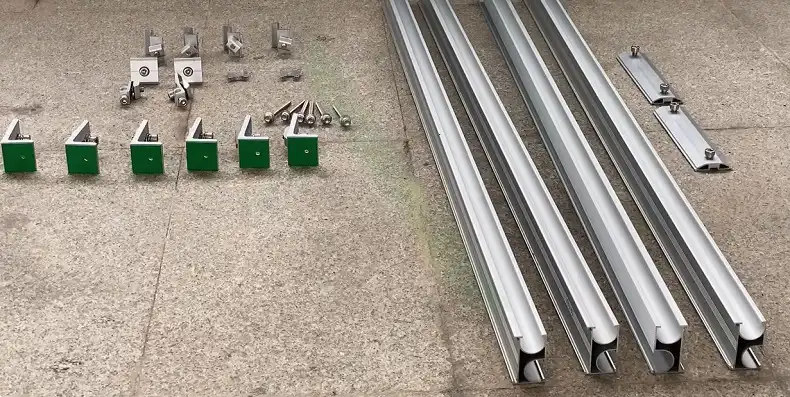
1. Grounding Rods
Grounding rods are the literal foundation of your grounding system. Here’s what you need to know:
- Material: Usually made of copper-bonded steel for durability and conductivity.
- Length: Typically 8 to 10 feet long.
- Installation: Driven vertically into the ground, leaving about 6 inches above ground for wire attachment.
- Purpose: Provides a direct path for electrical current to dissipate into the earth.
Pro Tip: In areas with rocky soil or high soil resistance, you might need multiple grounding rods or alternative grounding methods like a ground ring.
2. Copper Wire
The wire that connects your solar equipment to the grounding rod is crucial. Here’s why copper is the go-to choice:
- Material: Bare copper wire is standard for outdoor grounding.
- Size: #6 AWG (American Wire Gauge) is typically the minimum size required by the NEC for outdoor use.
- Benefits: Copper is highly conductive and resistant to corrosion.
Remember: While you can use smaller gauge wire inside conduits, always use #6 AWG bare copper wire for exposed outdoor runs to meet code requirements and pass inspections.
3. Grounding Lugs and Clamps
These components ensure secure connections between your equipment and grounding wire:
- Grounding Lugs: Attached to solar panel frames and racking to provide a connection point for the grounding wire.
- Grounding Clamps: Used to securely attach the grounding wire to the grounding rod.
- Material: Usually made of corrosion-resistant metals like stainless steel or bronze.
4. Lightning Arrestors and Surge Protectors
While not strictly part of the grounding system, these devices work in conjunction with proper grounding to protect your solar equipment:
- Lightning Arrestors: Divert lightning strikes away from sensitive equipment.
- Surge Protectors: Absorb voltage spikes that could damage your inverter or other components.
- Installation: Typically installed at the inverter and sometimes at the solar array.
Pro Tip: While these devices offer additional protection, they’re not a substitute for proper grounding. They work best when used together with a well-designed grounding system.
Step-by-Step Guide to Grounding Solar Panels
Now that we’ve covered the essential components, let’s walk through the process of grounding your solar panel system.
Remember, while this guide provides a general overview, always consult your local regulations and consider professional help if you’re unsure.
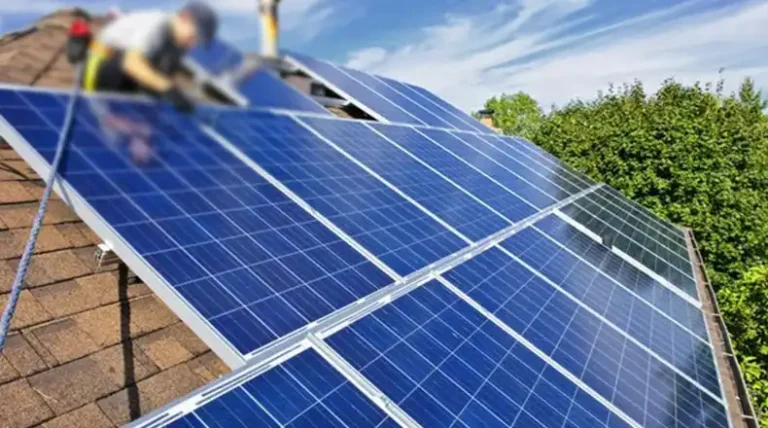
1. Reading Solar Racking Instructions
Before you start, carefully review the installation manual for your solar racking system. Here’s why:
- Many modern racking systems are UL-listed to bond PV module frames to the racking.
- The manual will show you the bonding points at each solar panel and across racking splices.
- Understanding this can simplify your grounding process significantly.
Pro Tip: If your racking system doesn’t have this feature, you’ll need to connect a grounding lug to each PV module frame and every piece of racking.
2. Installing Grounding Rods
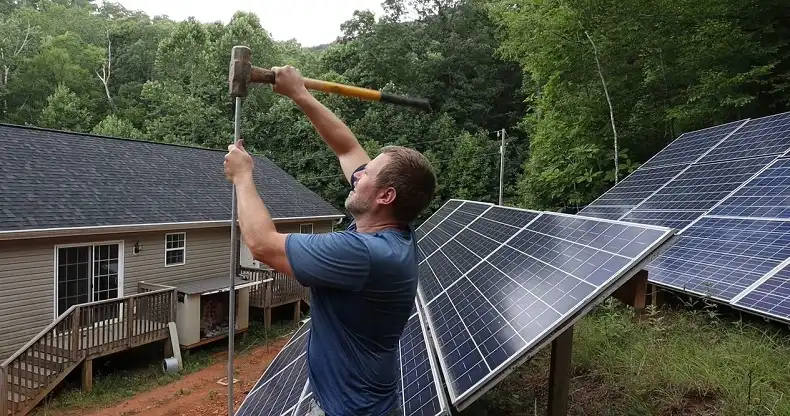
The first physical step in grounding is installing your grounding rod(s):
- Choose a location close to your solar array, ideally near your inverter.
- Using a sledgehammer or power driver, drive the rod at least 8 feet into the ground.
- Leave about 6 inches above ground for wire attachment.
Note: In some cases, you might need multiple rods or alternative grounding methods. Always check local requirements.
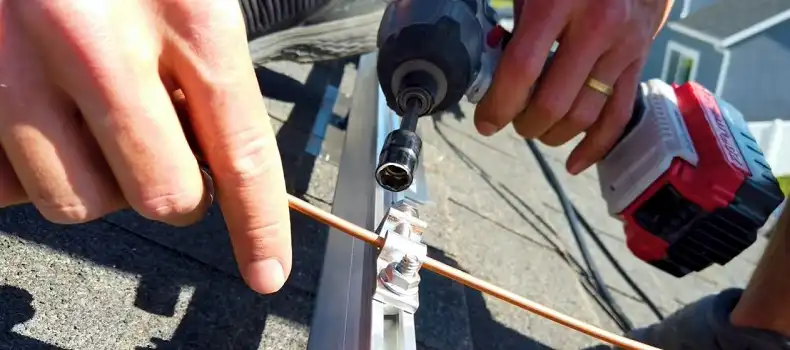
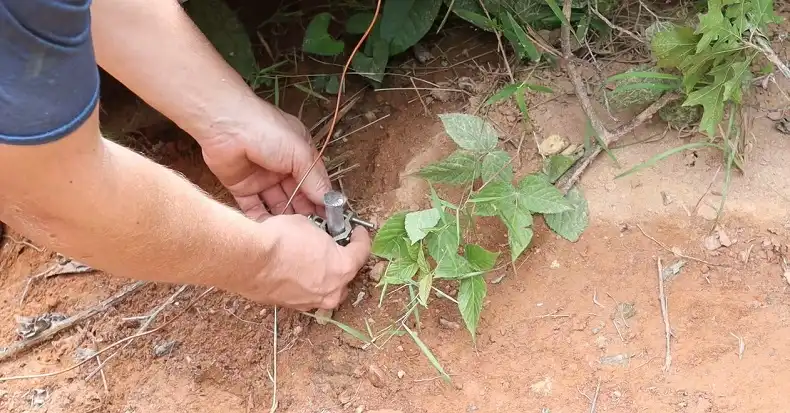
3. Connecting Grounding Wire
Next, you’ll connect your grounding wire:
- Start at the grounding rod, leaving enough slack to make a secure connection.
- Run the #6 AWG bare copper wire along your racking system.
- Use appropriate clamps to secure the wire to the grounding rod.
Remember: Always use #6 AWG bare copper wire for exposed outdoor runs to meet code requirements.
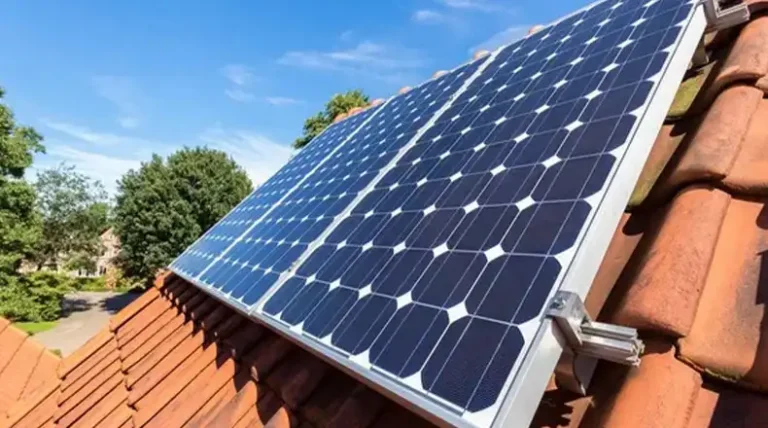
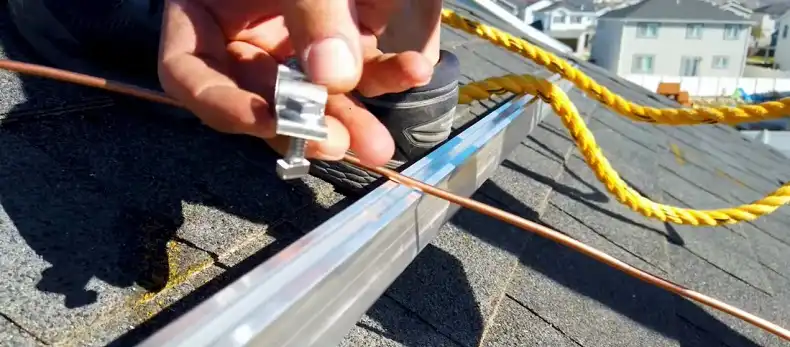
4. Bonding Solar Panel Frames and Racking
Now, you’ll connect your solar panels and racking to the grounding wire:
- If your racking system is UL-listed for bonding, connect the grounding conductor to one rail in each row.
- If not, attach a grounding lug to each panel frame and racking component.
- Connect these lugs to your main grounding wire.
Pro Tip: Ensure all connections are tight and use appropriate hardware to prevent corrosion.
5. Grounding Metal Conduits
Don’t forget about your conduits:
- All metal conduits, including EMT and FMC, need to be grounded.
- Install grounding bushings at the ends of your conduit before pulling wire through.
- Connect these bushings to your grounding system.
This step is often overlooked but is crucial for passing inspections and ensuring comprehensive protection.
Common Grounding Mistakes to Avoid
Even with the best intentions, it’s easy to make mistakes when grounding solar panels. Here are some common pitfalls to watch out for:
Using Incorrect Wire Size
One of the most frequent errors is using the wrong size wire for grounding:
- Always use #6 AWG bare copper wire for exposed outdoor runs.
- Smaller gauge wire can be used inside conduits, but #6 AWG is required for exposed areas.
- Using smaller wire outdoors can lead to failed inspections and potential safety hazards.
Pro Tip: When in doubt, go with #6 AWG. It’s better to exceed requirements than to fall short.
Improper Connections
Loose or corroded connections can compromise your entire grounding system:
- Ensure all connections are tight and secure.
- Use appropriate hardware designed for outdoor use to prevent corrosion.
- Regularly inspect connections, especially after extreme weather events.
Remember: A single weak link in your grounding system can render it ineffective.
Neglecting to Ground All Metal Components
It’s easy to overlook some metal parts of your solar installation:
- Ground all metal conduits, including EMT and FMC.
- Don’t forget about junction boxes, combiner boxes, and other metal enclosures.
- If your racking system isn’t UL-listed for bonding, each piece needs to be individually grounded.
Pro Tip: Walk through your entire system and identify every metal component. If it’s conductive and part of your solar installation, it probably needs to be grounded.
Additional Grounding Considerations
While we’ve covered the basics of grounding solar panels, there are some additional factors to consider depending on your specific installation:
Off-grid vs. Grid-tied Systems
The grounding requirements can differ slightly between off-grid and grid-tied systems:
Off-grid Systems:
- May require more robust grounding due to lack of connection to utility ground.
- Often involve battery banks, which need their own grounding considerations.
Grid-tied Systems:
- Usually connect to the home’s existing grounding system.
- May require additional grounding if the solar array is far from the main service panel.
Pro Tip: For off-grid systems, consider using a ground ring around your entire array for enhanced protection.
Grounding for Different Roof Types
The roof material can affect how you approach grounding:
Metal Roofs:
- Require special attention to avoid creating leak points.
- May need isolation mounts to prevent galvanic corrosion between different metals.
Tile Roofs:
- Can make running ground wire more challenging.
- May require special flashing or mounting systems to maintain roof integrity.
Flat Roofs:
- Often use ballasted mounting systems, which have their own grounding requirements.
Always consult with a roofing professional to ensure your grounding method doesn’t compromise your roof’s waterproofing.
Maintenance and Inspection of Grounding Systems
Grounding isn’t a “set it and forget it” task:
- Regularly inspect all grounding connections for signs of corrosion or looseness.
- Check grounding rod connections after severe weather events.
- Consider having a professional electrician perform annual checks on your grounding system.
Remember: A well-maintained grounding system is crucial for the long-term safety and performance of your solar installation.
By considering these additional factors, you can ensure your grounding system is tailored to your specific needs and maintains its effectiveness over time.
Conclusion
Properly grounding your solar panel system is a critical step that should never be overlooked or rushed. It’s not just about meeting code requirements – it’s about ensuring the safety of your home and the longevity of your solar investment.
Throughout this guide, we’ve covered the key aspects of solar panel grounding, from understanding regulatory requirements to avoiding common mistakes.
Remember, the most crucial takeaway is to always use #6 AWG bare copper wire for outdoor grounding. This simple yet vital detail can make the difference between passing and failing an inspection.
While DIY solar installations can be rewarding, grounding is an area where professional expertise can be invaluable.
If you’re unsure about any aspect of the grounding process, don’t hesitate to consult with a licensed electrician or solar installer. The peace of mind that comes with knowing your system is properly grounded is well worth the investment.