
Solar Panel Inspection Checklist: What To Expect
Solar panel installations are becoming increasingly popular as homeowners seek to reduce their carbon footprint and energy costs.
However, before your new solar system can start powering your home, it must pass a crucial step: the solar panel inspection. This process ensures that your installation meets all safety standards and local building codes.
To help you navigate this important phase, we’ve compiled a comprehensive solar panel inspection checklist.
Whether you’re a DIY enthusiast or working with a professional installer, understanding what inspectors look for can help you prepare effectively and increase your chances of passing on the first attempt.
From electrical components to structural integrity, our checklist covers all the essential elements that inspectors will evaluate.
By familiarizing yourself with these requirements, you’ll be well-equipped to ensure your solar panel system is not only efficient but also safe and compliant with all regulations.
Understanding Solar Panel Inspections
Solar panel inspections are a critical step in the installation process, ensuring that your new system is safe, efficient, and up to code.
Before diving into the specifics of what inspectors look for, it’s important to understand the broader context of these inspections.
1. Purpose of inspections
The primary goals of solar panel inspections are:
Safety: Ensuring the system doesn’t pose any fire or electrical hazards.
Code compliance: Verifying that the installation meets all local building and electrical codes.
Performance verification: Checking that the system is installed correctly for optimal energy production.
Structural integrity: Confirming that the roof or ground mount can support the added weight of the solar panels.
2. Who Conducts Inspections
Typically, solar panel inspections are conducted by:
Local government officials: Usually from the building or electrical department.
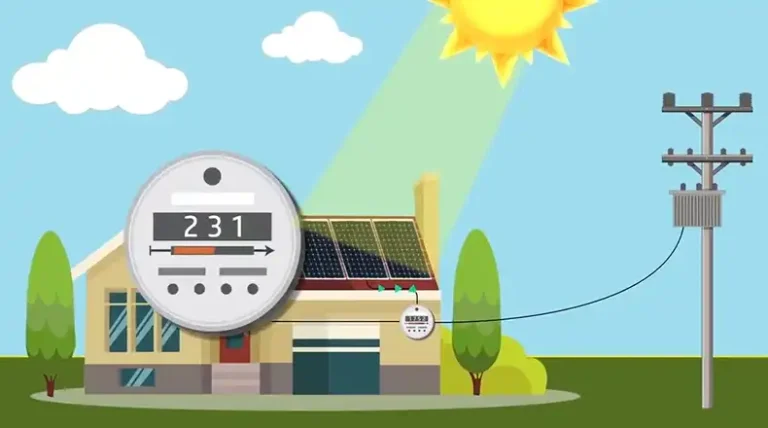
Utility company representatives: To ensure proper grid connection and metering.
Third-party inspectors: Sometimes hired by local authorities or solar companies for additional expertise.
3. When Inspections Occur
Inspections generally take place at these stages:
After installation: The main inspection occurs once the system is fully installed but before it’s activated.
During installation: Some jurisdictions require progress inspections for larger or more complex systems.
Periodic re-inspections: Some areas may require follow-up inspections after a certain period to ensure ongoing compliance and safety.
Understanding these basics helps set the stage for what to expect during your solar panel inspection. Now, let’s delve into the specific areas that inspectors will examine, starting with the electrical system.
Electrical System Inspection
The electrical components of your solar panel system are crucial for its safe and efficient operation. Inspectors pay close attention to this area, as it poses the highest potential for safety hazards if not installed correctly.
1. Main Service Panel Review
Inspectors will carefully examine your main electrical service panel to ensure:
Proper sizing: The panel must be able to handle the additional load from the solar system.
Correct breaker installation: Solar-specific breakers must be properly sized and installed.
Labeling: Clear labels identifying solar system components and shut-off procedures.
Capacity: Verifying that the total amperage doesn’t exceed the panel’s rated capacity.
2. Grounding And Wiring
Proper grounding is essential for safety. Inspectors will check:
- Grounding of solar panels and mounting rails
- Proper wire gauge and type for both AC and DC circuits
- Secure and correct wire connections
- Appropriate use of conduit for wire protection
3. Disconnect Switches
Both AC and DC disconnect switches are crucial safety features. Inspectors will verify:
- Proper installation of both AC and DC disconnects
- Correct placement near the meter and each other for easy access
- Clear labeling of disconnect switches
- Functionality of the switches
4. Safety Labels
All components of the solar system must be properly labeled. Inspectors will look for:
- Warning labels about the presence of a solar system
- Labels showing system specifications (voltage, amperage, etc.)
- Emergency shutdown procedure labels
- Inverter information labels
The electrical inspection is thorough and detailed because it’s critical for the safety of your home and the professionals who might need to work on your electrical system in the future.
Next, we’ll explore what inspectors look for in terms of the structural aspects of your solar installation.
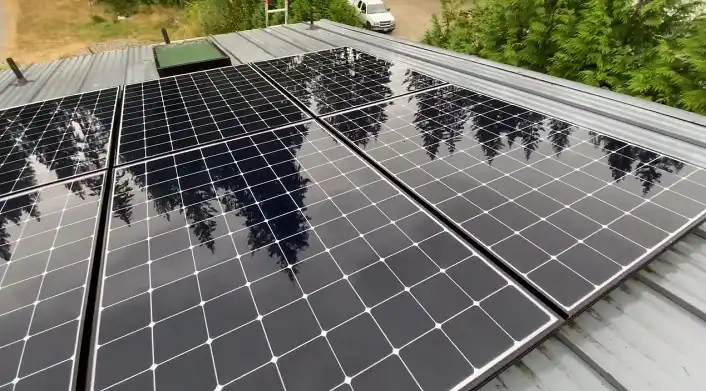
Structural Inspection
The structural inspection ensures that your solar panel system is securely installed and won’t compromise the integrity of your home. This is particularly important for roof-mounted systems, but also applies to ground-mounted arrays.
1. Panel Attachment
Inspectors will carefully examine how the solar panels are attached to your roof or ground mount structure:
- Secure fastening: All panels should be firmly attached to the mounting rails.
- Proper spacing: Panels should have the correct spacing for ventilation and fire safety.
- Rail installation: Mounting rails should be securely fastened to roof attachments or ground mounts.
- Roof penetrations: Any roof penetrations should be properly sealed and flashed to prevent leaks.
2. Roof Integrity
For roof-mounted systems, inspectors will assess:
- Roof condition: The roof should be in good condition with sufficient remaining lifespan.
- Weight distribution: The solar array should be properly distributed to avoid stress on specific areas.
- Structural reinforcement: If required, any additional roof support should be correctly implemented.
- Setbacks: Proper clearance from roof edges and peaks for fire safety and access.
3. Weather Resistance
The system must be able to withstand local weather conditions:
- Wind resistance: Mounting system should meet local wind load requirements.
- Water sealing: All roof penetrations and equipment should be properly sealed against water intrusion.
- Snow and ice considerations: In applicable areas, the system should account for snow loads and ice damming.
The structural inspection is crucial for ensuring that your solar panel system will remain secure and functional for its expected lifespan, without causing damage to your property.
With a clear understanding of what inspectors look for in both electrical and structural aspects, let’s move on to a comprehensive checklist that you can use to prepare for your inspection.
Solar Panel Inspection Checklist
This checklist covers the key items that inspectors typically evaluate. Use it to prepare for your inspection and increase your chances of passing on the first attempt.
Electrical Components
- Main service panel:
- Proper breaker size and installation
- Clear labeling of solar components
- Panel capacity not exceeded
- Wiring and conduit:
- Correct wire gauge and type used
- Proper conduit installation and support
- No exposed wiring
- Grounding:
- All metal components properly grounded
- Grounding electrode system in place
- Disconnects:
- AC and DC disconnects installed and accessible
- Clearly labeled and functional
- Inverter:
- Properly mounted and accessible
- Correct model as per approved plans
- Safety labels:
- All required warning and information labels in place
- Emergency shutdown procedures clearly displayed
Structural Elements
- Panel mounting:
- Panels securely fastened to rails
- Correct spacing and orientation
- Roof attachments:
- Proper flashing and sealing of roof penetrations
- Attachments secured to rafters or trusses
- Rail system:
- Securely installed and level
- Proper spacing as per manufacturer specifications
- Roof condition:
- No visible damage from installation
- Structural integrity maintained
- Setbacks:
- Required clearances from roof edges and ridges met
Documentation And Permits
- Approved plans on site
- Electrical diagrams available
- Equipment specifications accessible
- All required permits displayed
By systematically going through this checklist, you can ensure that your solar panel system meets the necessary requirements for inspection.
However, preparation goes beyond just checking off items on a list. Let’s explore some additional steps you can take to prepare for a successful inspection.
Preparing for Your Solar Panel Inspection
Proper preparation can significantly increase your chances of passing the inspection on the first try. Here are some key steps to take:
Review Your Plans
- Compare the installed system to your approved plans
- Note any changes made during installation
- Prepare explanations for any deviations from the original plans
Self-Inspection Tips
- Conduct a thorough walk-through using the checklist
- Take photos of key components for your records
- Test all accessible components for proper operation
- Ensure all areas are clean and free of debris
Common Issues To Address
- Missing or incorrect labels
- Loose connections or unsecured components
- Improper grounding
- Inadequate clearances or setbacks
By addressing these areas proactively, you can often catch and correct minor issues before the official inspection.
What to Expect During the Inspection
Understanding the inspection process can help alleviate anxiety and ensure a smooth experience.
Inspector’s role
- The inspector will thoroughly examine all aspects of your system
- They may ask questions about the installation process
- They will verify compliance with local codes and regulations
Homeowner’s involvement
- Be present during the inspection if possible
- Have all relevant documentation readily available
- Be prepared to answer questions or provide access to different areas
Potential outcomes
- Pass: Your system meets all requirements
- Conditional pass: Minor issues need to be addressed
- Fail: Major issues require correction and re-inspection
Remember, the inspector’s goal is to ensure safety and compliance, not to find fault. Approach the inspection as a collaborative process rather than an adversarial one.
After The Inspection
The steps following your inspection are crucial for getting your solar panel system up and running.
Passing The Inspection
- Receive official documentation of approval
- Schedule final utility connection if not already done
- Activate your system and start generating clean energy
Addressing Any Issues
- Review any noted deficiencies with your installer
- Create a plan to address these issues promptly
- Schedule a re-inspection if necessary
Final Approval And Activation
- Obtain permission to operate from your utility company
- Ensure your monitoring system is set up and functioning
- Familiarize yourself with system operation and maintenance
Conclusion
A solar panel inspection is a critical step in ensuring your new solar energy system is safe, efficient, and compliant with all regulations.
By understanding the inspection process and using the comprehensive checklist provided, you can approach your inspection with confidence.
Remember that preparation is key – a thorough self-inspection and addressing potential issues beforehand can save time and prevent the need for re-inspections.
While the process may seem daunting, it’s an important safeguard that ultimately benefits you as a homeowner.
Once your system passes inspection, you can enjoy the benefits of clean, renewable energy with the peace of mind that comes from knowing your installation meets the highest standards of safety and performance.
![[Answered] What Is a Safe Distance to Live From A Solar Farm?](https://www.itekenergy.com/wp-content/uploads/2023/07/What-Is-a-Safe-Distance-to-Live-From-A-Solar-Farm-768x428.webp)