How Do You Use Solar Path Lights?

Solar path lights are a game-changer for outdoor illumination, offering an eco-friendly and cost-effective way to enhance your landscape’s safety and beauty.
These clever devices harness the sun’s energy during the day to provide reliable lighting at night, all without increasing your electricity bill.
Whether you’re looking to illuminate a walkway, highlight garden features, or create ambiance in your outdoor living spaces, solar path lights are a versatile solution.
In this guide, we’ll walk you through everything you need to know about choosing, installing, and maintaining solar path lights to transform your outdoor areas.
From selecting the right type for your needs to maximizing their performance, we’ve got you covered with practical tips and creative ideas to light up your landscape sustainably.
1. Choosing the Right Solar Path Lights
When it comes to selecting solar path lights for your outdoor space, there are several factors to consider. The right choice can make a significant difference in both the functionality and aesthetics of your landscape lighting.
Consider The Purpose
Before purchasing solar path lights, think about what you want to achieve with them. Are you primarily concerned with safety, looking to illuminate walkways and stairs to prevent trips and falls?
Or are you more interested in enhancing the beauty of your garden and outdoor living areas? Maybe you’re aiming for a combination of both. Understanding your primary goal will help guide your selection process.
Safety-focused lights tend to be brighter and may have features like motion sensors. Aesthetic lights might offer softer illumination or decorative designs that complement your landscape.
Types Of Solar Path Lights Available
There’s a wide variety of solar path lights on the market, each suited to different needs and preferences:
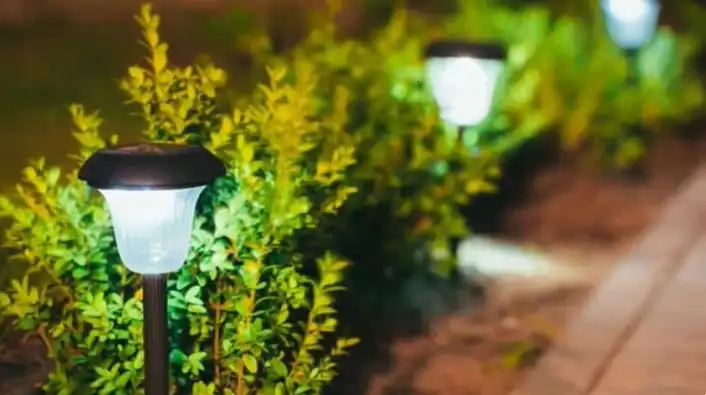
- Stake lights: These are the most common type, easily pushed into the ground along pathways or garden borders.
- Bollard lights: Taller and more substantial, these provide broader illumination and can serve as landscape features themselves.
- Step lights: Designed to be mounted on stairs or decks, these improve safety in elevated areas.
- Hanging lights: Perfect for creating ambiance, these can be hung from trees or pergolas.
- Floating lights: Ideal for ponds or water features, adding a magical touch to aquatic areas.
Features To Look For
When browsing solar path lights, pay attention to these key features:
- Brightness: Check the lumens rating. Higher lumens mean brighter light, but remember that ultra-bright isn’t always necessary or desirable for every situation.
- Battery life: Look for lights with high-capacity batteries that can store enough energy to last through the night, especially in areas with limited sunlight.
- Durability: Opt for weather-resistant materials like stainless steel or high-quality plastics that can withstand the elements.
- Charging efficiency: Some solar panels are more efficient than others. Look for lights with monocrystalline or polycrystalline panels for better energy conversion.
- Light color: Consider whether you prefer warm white light for a cozy feel or cool white light for better visibility.
- Smart features: Some high-end models offer app control, color-changing capabilities, or motion sensors for added convenience and functionality.
2. Planning Your Solar Path Light Installation
Proper planning is crucial for a successful solar path light installation. Taking the time to assess your space and strategize your layout will ensure optimal performance and the best visual impact.
1. Assessing Your Outdoor Space
Start by taking a thorough look at your outdoor areas:
- Identify key areas: Note walkways, garden beds, water features, and seating areas that could benefit from lighting.
- Consider traffic patterns: Think about how people move through your space and where lighting would be most beneficial for safety and navigation.
- Evaluate existing lighting: Take stock of any current outdoor lighting to avoid redundancy and ensure new solar lights complement what’s already in place.
- Check for obstacles: Look for large trees, buildings, or other structures that might cast shadows on your solar lights.
2. Determining The Best Locations For Lights
Once you’ve assessed your space, it’s time to plan your light placement:
- Walkways and paths: Space lights evenly along edges, typically about 6-8 feet apart for consistent illumination.
- Focal points: Use lights to highlight special features like statues, water elements, or prized plants.
- Entrances and transitions: Place lights near steps, gates, or changes in elevation for safety.
- Seating areas: Consider softer, ambient lighting around patios or decks for a cozy atmosphere.
- Driveway: If lighting a driveway, place lights far enough apart to guide without overwhelming.
3. Considering Sun Exposure For Optimal Charging
The effectiveness of solar lights depends heavily on their ability to receive adequate sunlight:
- Observe sun patterns: Watch how sunlight moves across your yard throughout the day. Ideal spots receive at least 6-8 hours of direct sunlight.
- Avoid shade: Keep lights away from areas that are shaded by buildings, dense trees, or large shrubs for most of the day.
- Adjust for seasons: Remember that sun patterns change with the seasons. A spot that’s sunny in summer might be shaded in winter.
- Consider panel angles: Some solar lights allow you to adjust the angle of the solar panel. In northern latitudes, a slight southern tilt can improve charging efficiency.
- Plan for alternatives: For areas with limited sun exposure, consider running lights with separate solar panels that can be placed in sunnier locations.
3. Solar Path Lights Installation Process
With your planning complete, it’s time to bring your solar path lighting vision to life. The installation process is generally straightforward, but attention to detail will ensure the best results.
1. Gathering Necessary Tools And Materials
Before you begin, make sure you have everything you need:
- Solar path lights (obviously!)
- Screwdriver (if assembly is required)
- Rubber mallet or hammer (for gently tapping stakes into place)
- Garden gloves
- Measuring tape or string (for spacing)
- Small shovel or trowel (for preparing the ground)
- Level (to ensure lights are straight)
2. Preparing The Ground
Proper ground preparation is key to a stable and attractive installation:
- Clear the area: Remove any debris, rocks, or weeds from the installation spots.
- Soften the soil: If the ground is hard, water it lightly to make it easier to work with.
- Mark your spots: Use marking spray or place temporary stakes to outline where your lights will go, ensuring even spacing.
- Check for underground utilities: If you’re planning to dig deeper than a few inches, always call your local utility company to check for buried lines.
3. Step-By-Step Installation Guide
Now, let’s walk through the installation process:
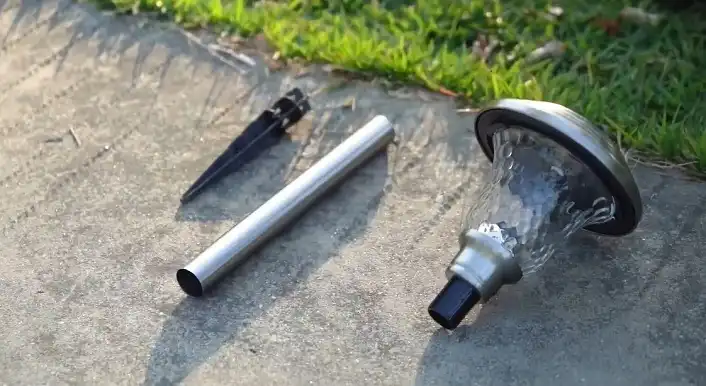
- Assemble the lights: If your lights come in parts, assemble them according to the manufacturer’s instructions.
- Charge the lights: Place the assembled lights in direct sunlight for at least a full day to ensure they’re fully charged before installation.
- Prepare the holes: Use your trowel or shovel to create small holes or indentations where each light will be placed.
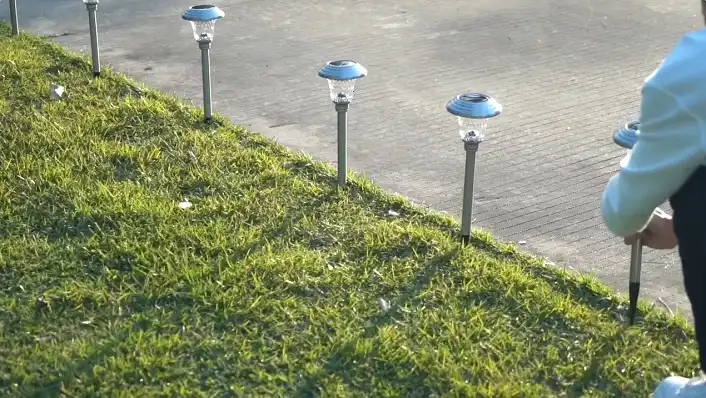
- Insert the stakes: Gently push each light’s stake into the prepared spot. If the ground is soft, you may be able to do this by hand. For harder soil, use a rubber mallet to tap them in carefully.
- Ensure stability: Once inserted, gently wiggle each light to make sure it’s secure. Add or remove soil around the base as needed for stability.
- Check alignment: Use your level to ensure each light is straight. Adjust as necessary.
- Fine-tune spacing and positioning: Step back and look at your lights from various angles. Make any final adjustments to ensure they’re evenly spaced and aligned properly.
- Activate the lights: Most solar lights have an on/off switch. Make sure each light is turned on.
- Clean up: Remove any debris or excess soil, and dispose of packaging materials properly.
- Final check: Wait until dusk to see your newly installed lights in action. This is your chance to make any last-minute tweaks to positioning or angle.
Remember, the key to a successful installation is patience and attention to detail. Take your time with each step, and don’t hesitate to make adjustments as you go.
With careful installation, your solar path lights will not only look great but will also stand up to the elements and provide reliable illumination for years to come.
Maximizing Performance and Longevity
To get the most out of your solar path lights, proper maintenance and care are essential. By following these tips, you can ensure your lights perform optimally and last for years to come.
Proper Maintenance Tips
Regular maintenance will keep your solar path lights looking great and functioning efficiently:
- Clean regularly: Wipe down the solar panels and light covers with a damp cloth every few weeks to remove dust, dirt, and pollen that can reduce efficiency.
- Check for damage: Inspect your lights periodically for any signs of wear, cracks, or water ingress, especially after severe weather.
- Trim surrounding vegetation: Keep plants and grass from overshadowing or obstructing your lights.
- Reposition as needed: As seasons change, you may need to adjust the position of some lights to ensure they receive adequate sunlight.
- Winter care: In snowy areas, either remove lights for the season or keep snow cleared from the solar panels.
Troubleshooting Common Issues
Even with good maintenance, you might encounter some issues. Here’s how to address common problems:
- Dim lights:
- Check for debris on the solar panel
- Ensure the light is receiving enough direct sunlight
- The battery may need replacing (typically every 1-2 years)
- Lights not turning on:
- Verify the switch is in the ‘on’ position
- Check for corrosion on battery contacts
- Ensure the light sensor isn’t obstructed or confused by nearby light sources
- Short runtime:
- The battery may not be fully charging due to insufficient sunlight
- Cold temperatures can reduce battery performance
- The battery might need replacement
- Water damage:
- Check seals and gaskets for proper fit
- Consider relocating lights prone to standing water
Seasonal considerations
Different seasons bring different challenges for solar lights:
- Spring:
- Clean lights thoroughly after winter
- Reposition lights if needed as the sun’s path changes
- Summer:
- Enjoy peak performance with long days
- Keep an eye out for heat damage in extremely hot climates
- Fall:
- Clear fallen leaves regularly
- Adjust light positions as days shorten
- Winter:
- In mild climates, adjust angles to capture lower sun
- In harsh winters, consider removing lights or using cold-resistant models
Creative Uses for Solar Path Lights
While solar path lights are primarily designed for illuminating walkways, their versatility allows for numerous creative applications in your outdoor space.
By thinking outside the box, you can use these lights to enhance various aspects of your landscape and create stunning visual effects.
Highlighting Landscape Features
Solar path lights can be used to draw attention to your garden’s best features:
- Accent lighting: Place lights at the base of trees, sculptures, or architectural elements to create dramatic uplighting effects.
- Garden bed borders: Line the edges of flower beds or vegetable gardens to define spaces and add visual interest at night.
- Water feature illumination: Position lights around ponds, fountains, or streams to create magical reflections and enhance the ambiance.
- Rock garden showcase: Use lights to cast interesting shadows and highlight the textures of rock gardens or xeriscapes.
Enhancing Outdoor Living Areas
Transform your outdoor living spaces into cozy, inviting areas for evening relaxation:
- Deck and patio ambiance: Place lights around the perimeter of decks or patios to create a warm, welcoming atmosphere.
- Outdoor kitchen lighting: Use solar lights to illuminate food prep areas or dining spaces for evening entertaining.
- Firepit surround: Arrange lights in a circle around a firepit area to define the space and provide subtle illumination.
- Pergola or gazebo accent: Hang solar lanterns or string lights from outdoor structures to create a magical overhead canopy of light.
Combining With Other Lighting Techniques
Solar path lights can work in harmony with other lighting methods for a comprehensive landscape lighting design:
- Layered lighting: Combine path lights with spotlights and floodlights to create depth and dimension in your outdoor spaces.
- Moonlighting effect: Place solar lights high in trees to mimic the soft, dappled light of the moon filtering through branches.
- Color play: Mix solar path lights with colored LED landscape lights for a dynamic and eye-catching display.
- Holiday decorating: Incorporate solar path lights into your seasonal decorations for added sparkle and safety during festivities.
Conclusion
Solar path lights offer an eco-friendly, cost-effective, and versatile solution for illuminating and enhancing your outdoor spaces.
From improving safety along walkways to creating enchanting ambiance in your garden, these lights provide numerous benefits with minimal effort and ongoing costs.
By carefully selecting the right lights for your needs, thoughtfully planning their placement, and following proper installation and maintenance procedures, you can create a stunning and functional lighting system that transforms your landscape after dark.
Remember to consider factors like sun exposure, seasonal changes, and creative applications to make the most of your solar path lights.