How to Attach a Solar Power Charger to Your Hiking Backpack?
I’m not much of a hiker myself, but I once helped a friend set up a solar charger on their backpack for long hiking trips. Watching them constantly run out of battery on the trails was frustrating, so we looked into a portable solar solution. This guide shares the steps we followed to securely mount the charger, allowing it to stay powered up by using the sun’s energy. It’s an easy process when you know what to do. Soon your hiking adventures won’t be cut short by drained devices either!
Steps to Attach a Solar Power Charger to Your Hiking Backpack
Getting a solar charger properly attached to your backpack is crucial for hassle-free charging on the go. With some basic materials and a little preparation, you can easily mount your charger in just a few simple steps. Follow this guide to securely position the solar panel where it will absorb optimal sunlight throughout your hike.
Step 1 – Pick a Way to Attach It
First up, you need to decide how to actually attach the solar charger to your backpack. Some solar chargers come with special straps or clips specifically designed for connecting them to a backpack. If your charger has these, great! Use them. Follow any instructions that came with the charger on using those straps or clips.
If your solar charger didn’t come with any attachments, no problem. You can make your own using simple materials. You’ll need some carabiners (those are the little clip things rock climbers use) and either straps or a strong cord. Loop the strap or cord through the holes on the solar charger itself. Then clip a carabiner onto the strap/cord loop you made. Now you can use that carabiner to easily clip the charger onto your backpack.
Pro Tip: When choosing the cord, consider thickness and weight. Opt for something strong enough to hold the charger securely but light enough not to weigh you down.
Step 2 – Find the Best Spot on Your Backpack
Backpacks all have different shapes and designs. So take a minute to look over yours and find the absolute best place to put that solar charger. The most important factor is making sure it will get direct sunlight throughout your hike. The top or back of the backpack itself is usually the spot that sees the most sun exposure. Try to avoid areas that will be shaded or blocked by other gear you’re carrying.
Also, consider the actual size and shape of your solar charger panel. Make sure wherever you attach it, the panel will lay flat and not get all bunched up or bent in a weird curved position. And double check that the spot you pick won’t cause the charger to rub annoyingly against you or get in your way while hiking.
Remember: Every backpack is different, so experiment a bit to find the sweet spot that optimizes sun exposure, accessibility, and balance.
Step 3 – Attach the Top of the Charger
Once you’ve identified that perfect sunny spot on your backpack, it’s time to actually get the solar charger attached up top first. If your charger came with those special attachment straps or clips, use them now to secure the top portion following any instructions.
If you’re using the carabiner and strap method instead, loop the strap through the charger’s holes at the top. Then loop it around the top area of your backpack and pull it tight. But not too tight! You want the charger’s top sitting snug against the backpack without any loose sagging areas. Double check that the carabiner is solidly clipped onto a strong part of the backpack.
Step 4 – Attach the Bottom of the Charger
To prevent that solar charger from flopping around or shifting positions while you’re hiking, you need to also secure the bottom part down. You’ll use the same technique from Step 3 – either those included attachment straps or the carabiner and strap method you made.
When attaching the bottom, pull the strap tight enough that the charger panel lays flat and secure against your backpack. But don’t make it so tight that it starts straining or warping the panel itself or bending your backpack’s shape. A little bit of slack is okay as long as there’s no loose flopping. Check that everything is properly attached before heading out.
Bonus Tip – Consider a Special Solar Backpack
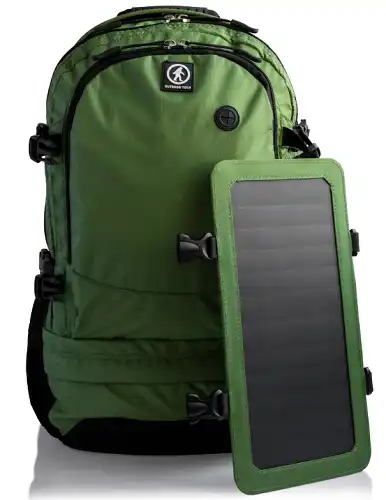
For the easiest and most convenient solar charging setup, you may want to invest in a backpack specially designed with built-in solar panels made for outdoor adventures.
These solar backpacks come with the solar panels already perfectly positioned and attached to get direct sunlight while hiking. Many also have charging ports and battery packs built right into the backpack itself. This lets you simply plug your devices into the backpack to charge without needing any separate solar chargers or gear. Just pack up and go!
Solar backpacks are made of tough, water-resistant materials ideal for rugged outdoor use. They can handle getting rained on or rubbing against rocks without issues. While more expensive upfront, a quality solar backpack streamlines and simplifies keeping your electronics charged on long hiking trips.
Wrapping Up
There you have the process my friend and I used for adding solar power to their hiking backpack years ago. It wasn’t complicated by any means – just some basic preparation and properly securing the charger in the right spots. With those steps, they could charge their electronics on the go using renewable energy. While I don’t hike much myself, I’m glad I could share these tips so your own outdoor adventures never get cut short by dead batteries again. Feel free to leave any other questions! Wishing you many memory-filled journeys with devices fully charged.