Solar Light Blinking On and Off | Why and What to Do?
Solar lights are a sustainable and energy-efficient way to light up your outdoor space. However, one common problem with solar lights is that they can start to blink on and off. This can be frustrating and unsightly, and it can also make it difficult to enjoy your outdoor space at night.
There are a number of reasons why solar lights might start to blink on and off. Such as low battery, loose wiring, and so on.
If your solar light is blinking on and off, there are a few things you can do to try to fix the problem. In this article, I will discuss the most common causes of solar light flickering and provide troubleshooting tips to help you get your solar lights working properly again.
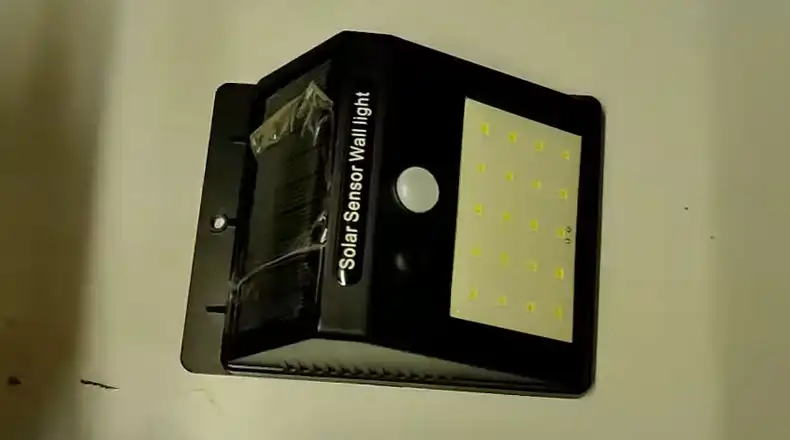
Why Solar Light is Flickering?
When it comes to solar lights blinking on and off, there’s usually a reason behind the madness. Let’s explore some of the most common culprits:
Low Battery Power
One of the most frequent reasons for a blinking solar light is low battery power. It’s like your light is trying to conserve energy by putting on a light show!
Here’s what might be happening:
- The battery isn’t getting enough charge during the day
- The battery is old and can’t hold a charge as well as it used to
- Cold weather is affecting the battery’s performance
Remember, solar lights rely on their batteries to store energy collected during the day. If the battery is struggling, your light might start to blink as a way of saying, “Hey, I’m running low here!”
Dirty Solar Panel
Think of your solar panel as the light’s lunch box. If it’s dirty, it can’t collect enough energy to keep your light well-fed and happy.
A dirty solar panel can cause blinking because:
- Less sunlight reaches the solar cells
- The light can’t store enough energy for consistent nighttime use
- The system might think it’s nighttime even during the day
Keeping your solar panel clean is like making sure your light gets a good, hearty meal every day. A well-fed light is a happy, steady-shining light!
Faulty Light Sensor
The light sensor is like the DJ of your solar light, deciding when it’s time to turn on and off. If it’s not working correctly, you might end up with an impromptu light show.
A faulty sensor can cause blinking by:
- Confusing day for night (or vice versa)
- Rapidly switching the light on and off
- Misinterpreting shadows or artificial light as darkness
When the sensor goes haywire, your light might start blinking like it’s at a rave!
Loose Connections
Sometimes, the problem is as simple as a bad connection. It’s like when your phone charger only works if you hold it at just the right angle.
Loose connections can cause blinking because:
- The circuit is intermittently broken
- Power isn’t flowing consistently to the light
- The system is trying to operate with an unstable power supply
These loose connections can be in the wiring, at the battery terminals, or even in the light fixture itself.
Water Damage
Water and electronics mix about as well as oil and water – which is to say, not at all! If water has found its way into your solar light, it might cause some erratic behaviour.
Water damage can lead to blinking by:
- Shorting out electrical components
- Corroding connections
- Interfering with the light sensor
While most solar lights are designed to be weather-resistant, they’re not always completely waterproof. A particularly heavy rainstorm or accumulated moisture over time can sometimes find its way in.
What to Do to Stop the Solar Light Flickering?
Now that we’ve explored these reasons, let’s delve into practical solutions to keep your solar lights steady and bright:
Clean the Solar Panels
Clean solar panels are more efficient than dirty ones. Dirt, dust, and other debris can block sunlight from reaching the solar cells, which reduces the amount of electricity the panels can produce. Regularly cleaning the panels can help to improve their efficiency and extend their lifespan.
The best way to clean solar panels is with a soft brush and a mild soap and water solution. Avoid using abrasive cleaners or scrubbers, as these can scratch the panels and damage the anti-reflective coating.
Optimize Placement
The placement of your solar lights is important for ensuring that they receive maximum sunlight during the day and are able to charge fully. You should also consider the areas that you want to illuminate when choosing the placement of your solar lights.
Here are some tips for optimizing the placement of your solar lights:
- Choose a location that receives at least 6 hours of direct sunlight per day.
- Install lights facing south at a 30-45° angle for optimal output.
- Avoid placing the lights in areas that are shaded by trees, buildings, or other structures.
- Trim back any overhanging branches or shrubs that may cast shadows on the lights.
- Consider the areas that you want to illuminate when choosing the placement of your solar lights. For example, if you want to illuminate a walkway, you will need to place the lights along the path.
- If possible, place the solar lights in a high location so that they can cast more light.
Replace the Batteries
Over time, the batteries in solar lights will lose their ability to hold a charge. This is due to a number of factors, including the age of the batteries, the type of batteries used, and the climate in which the lights are used.
If you find that your solar lights are not staying on as long as they used to, or if they are not turning on at all, it is likely that the batteries need to be replaced.
Solar Light Inspection
Solar lights are a great way to add light to your yard or garden without having to worry about running electrical cords. However, occasionally, solar lights may become damaged, which can cause them to malfunction.
To inspect your solar lights for damage, follow these steps:
- Check the solar panel. Look for any cracks, chips, or scratches on the solar panel. Make sure that the solar panel is not bent or warped.
- Check the wiring. Look for any loose wires or frayed insulation. Make sure that all of the connections are tight and secure.
- Check the sensor. Look for any cracks or damage to the sensor. Make sure that the sensor is not obstructed by dirt or debris.
- Check the light bulb. Look for any burned-out light bulbs. Make sure that the light bulbs are the correct type for your solar lights.
Final Thoughts
Solar lights are there to enhance the beauty of your outdoor space, not create headaches. By understanding why solar lights flicker and taking the necessary steps to resolve the issue, you can enjoy uninterrupted, enchanting evenings in your garden or along your pathways. Say goodbye to the disco lights and hello to the serene, steady glow of your solar lights.
If you have more questions or stories to share about your solar light adventures, we’re all ears. Thanks for reading, and may your nights be brightly lit!
FAQs (Frequently Asked Questions)
How can I improve the performance of my solar lights?
You can enhance the performance of your solar lights by ensuring they receive adequate sunlight, keeping the solar panels clean, replacing old batteries, and regularly inspecting for any visible damage or obstructions. These steps will help your lights shine brightly and consistently.
Do all solar lights flicker at some point?
It’s not uncommon for solar lights to experience flickering, but it’s not a universal issue. Proper maintenance and suitable placement can significantly reduce the chances of flickering. High-quality solar lights may also have more robust components, reducing the likelihood of flickering.
Can I use regular batteries in solar lights?
Solar lights are designed to work with rechargeable batteries specifically made for solar applications. Regular batteries may not charge properly or could damage the light. It’s advisable to use the recommended rechargeable batteries for optimal performance.
How often should I replace the batteries in my solar lights?
The lifespan of solar light batteries varies, but you might need to replace them every 1-2 years, depending on usage and environmental conditions. Keep an eye on their performance, and if you notice a significant decrease in illumination time, it’s a good indication that it’s time for a battery replacement.

